<?xml version="1.0" encoding="utf-8"?><feed xmlns="http://www.w3.org/2005/Atom" ><generator uri="https://jekyllrb.com/" version="3.10.0">Jekyll</generator><link href="https://tamadillo.github.io/hall-w-EV/feed.xml" rel="self" type="application/atom+xml" /><link href="https://tamadillo.github.io/hall-w-EV/" rel="alternate" type="text/html" /><updated>2026-08-17T00:32:19+10:00</updated><id>https://tamadillo.github.io/hall-w-EV/feed.xml</id><title type="html">Hall-w-EV</title><subtitle>A UNO Q powered EV that can drive down the hall way</subtitle><entry><title type="html">Post 5 - Teaching it to chase a tennis ball</title><link href="https://tamadillo.github.io/hall-w-EV/post/vision/autonomy/2026/08/16/post-5-chase-the-ball.html" rel="alternate" type="text/html" title="Post 5 - Teaching it to chase a tennis ball" /><published>2026-08-16T22:30:00+10:00</published><updated>2026-08-16T22:30:00+10:00</updated><id>https://tamadillo.github.io/hall-w-EV/post/vision/autonomy/2026/08/16/post-5-chase-the-ball</id><content type="html" xml:base="https://tamadillo.github.io/hall-w-EV/post/vision/autonomy/2026/08/16/post-5-chase-the-ball.html"><![CDATA[<p>Hi again, it’s <a href="https://github.com/hambreros">Hambreros</a> and <a href="https://github.com/tamadillo">Tamadillo</a>.
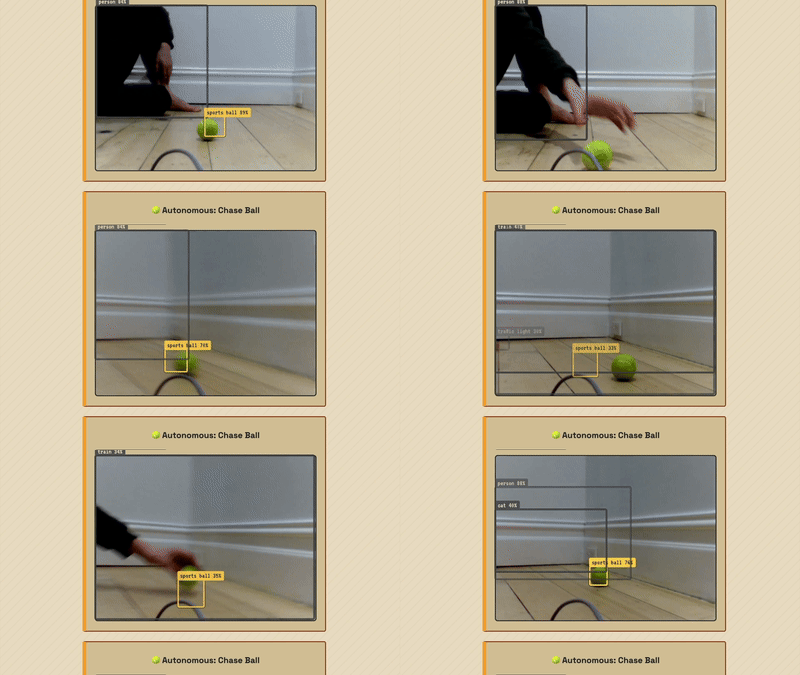
Last post <a href="https://community.element14.com/challenges-projects/design-challenges/ez-ev-challenge/f/forum/57184/hall-w-ev---post-4---giving-it-eyes">gave it eyes</a>. This one gives it something to do
with them: place a tennis ball 🎾 in front of it and the robot drives itself
towards it, no hands.</p>

<h2 id="what-weve-actually-built">What we’ve actually built</h2>

<p>A 🎾 CHASE toggle next to the joystick. Flip it on, and:</p>

<ul>
  <li>The robot looks for a ball in the camera feed.</li>
  <li>Off-center → it turns towards it.</li>
  <li>Small (far away) → it drives forward. Big enough (close) → it eases off
and stops.</li>
  <li>Ball out of frame → it just stops, same as letting go of the joystick.</li>
  <li>Manual controls (joystick, keyboard, per-wheel sliders) go greyed-out and
unresponsive while this is on, so nothing’s fighting the robot for the
wheel. The ⏻ MOTOR ON/OFF buttons still work regardless — always an
independent kill switch, whoever’s driving.</li>
</ul>

<h2 id="finding-the-right-brick">Finding the right brick</h2>

<p>Same move as every other feature so far: before writing a line of code,
went and read <a href="https://github.com/arduino/app-bricks-py">arduino/app-bricks-py</a> to see what already
exists. Turns out there’s a whole family of vision bricks —
<code class="language-plaintext highlighter-rouge">gesture_recognition</code>, <code class="language-plaintext highlighter-rouge">mood_detector</code>, <code class="language-plaintext highlighter-rouge">image_classification</code>,
<code class="language-plaintext highlighter-rouge">object_detection</code>, <code class="language-plaintext highlighter-rouge">visual_anomaly_detection</code> — and the one that actually
fits is <code class="language-plaintext highlighter-rouge">video_objectdetection</code>: continuous detection off a live camera
stream, with per-label callbacks carrying a confidence score and a
bounding box.</p>

<p>Its <code class="language-plaintext highlighter-rouge">brick_config.yaml</code> lists:</p>

<div class="language-yaml highlighter-rouge"><div class="highlight"><pre class="highlight"><code><span class="na">model_by_boards</span><span class="pi">:</span>
    <span class="pi">-</span> <span class="na">platform</span><span class="pi">:</span> <span class="s">ventunoq</span>
      <span class="na">model</span><span class="pi">:</span> <span class="s">yolox-qnn-object-detection</span>
    <span class="pi">-</span> <span class="na">platform</span><span class="pi">:</span> <span class="s">unoq</span>
      <span class="na">model</span><span class="pi">:</span> <span class="s">yolox-object-detection</span>
</code></pre></div></div>

<p><code class="language-plaintext highlighter-rouge">UNO Q</code> — this exact board. Not a VENTUNO-only NPU thing, unlike the neural
TTS detour a couple posts back. Genuinely usable here.</p>

<h2 id="no-training-required--just-check-the-label-list">No training required — just check the label list</h2>

<p>The obvious worry: does a generic pretrained model know what a tennis ball
is? Didn’t want to assume, so went and checked
<a href="https://github.com/arduino/app-bricks-py/blob/main/models/models-list.yaml"><code class="language-plaintext highlighter-rouge">models/models-list.yaml</code></a> in the same repo before writing
any detection code — it’s a YOLOX-Nano model trained on COCO’s 80 classes,
and the label list includes, verbatim:</p>

<div class="language-yaml highlighter-rouge"><div class="highlight"><pre class="highlight"><code><span class="pi">-</span> <span class="s">sports ball</span>
</code></pre></div></div>

<p>That’s the actual class name (there’s no separate “tennis ball” class in
COCO, but “sports ball” covers it — it’s the canonical example object for
that class in the dataset). So: zero custom training, zero Edge Impulse
model work. Just register a callback for a class that’s already in the
box.</p>

<div class="language-python highlighter-rouge"><div class="highlight"><pre class="highlight"><code><span class="kn">from</span> <span class="nn">arduino.app_bricks.video_objectdetection</span> <span class="kn">import</span> <span class="n">VideoObjectDetection</span>

<span class="n">detector</span> <span class="o">=</span> <span class="n">VideoObjectDetection</span><span class="p">(</span><span class="n">camera</span><span class="o">=</span><span class="n">shared_camera</span><span class="p">,</span> <span class="n">confidence</span><span class="o">=</span><span class="mf">0.5</span><span class="p">)</span>
<span class="n">detector</span><span class="p">.</span><span class="n">on_detect</span><span class="p">(</span><span class="s">"sports ball"</span><span class="p">,</span> <span class="n">on_ball_detected</span><span class="p">)</span>
<span class="n">detector</span><span class="p">.</span><span class="n">start</span><span class="p">()</span>
</code></pre></div></div>

<h2 id="one-camera-two-features-fighting-over-it">One camera, two features fighting over it</h2>

<p><code class="language-plaintext highlighter-rouge">video_objectdetection</code> wants its own <code class="language-plaintext highlighter-rouge">Camera</code> to forward frames to the
detection sidecar. We already have one open, for <a href="https://community.element14.com/challenges-projects/design-challenges/ez-ev-challenge/f/forum/57184/hall-w-ev---post-4---giving-it-eyes">last post’s live
feed</a>. Tried to hand-wave past this and it immediately
mattered: <code class="language-plaintext highlighter-rouge">Camera</code> claims its physical device the moment it’s constructed
— there’s an actual registry in the framework’s own source specifically so
auto-selection doesn’t grab something already in use — so a second,
independent <code class="language-plaintext highlighter-rouge">Camera("usb:0", ...)</code> for the same webcam wouldn’t just
contend for bandwidth, it’d fail outright.</p>

<p>Good thing <code class="language-plaintext highlighter-rouge">VideoObjectDetection(camera=...)</code> takes an existing instance
instead of always making its own. Added a small accessor to <code class="language-plaintext highlighter-rouge">camera.py</code>:</p>

<div class="language-python highlighter-rouge"><div class="highlight"><pre class="highlight"><code><span class="k">def</span> <span class="nf">get_camera</span><span class="p">():</span>
    <span class="s">"""Blocks until the startup attempt above has settled, then returns the
    shared Camera instance — or None if it never started successfully."""</span>
    <span class="n">_ready</span><span class="p">.</span><span class="n">wait</span><span class="p">()</span>
    <span class="k">return</span> <span class="n">_camera</span>
</code></pre></div></div>

<p><code class="language-plaintext highlighter-rouge">vision.py</code> calls that instead of constructing its own, so both features
share the one physical connection to the one webcam instead of racing for
it.</p>

<h2 id="steering-is-just-proportional-control">Steering is just proportional control</h2>

<p>No path planning, no PID tuning, nothing fancy — just “how far off-center
is it” and “how big is it,” recomputed fresh on every detection message:</p>

<blockquote>
  <p>PID - Proportional Kp, Integral Ki, and Derivative Kd, only recently saw this
video from Electronoobs and it looks complicated
https://www.youtube.com/watch?v=JFTJ2SS4xyA</p>
</blockquote>

<div class="language-python highlighter-rouge"><div class="highlight"><pre class="highlight"><code><span class="k">def</span> <span class="nf">_steer_towards</span><span class="p">(</span><span class="n">bbox</span><span class="p">):</span>
    <span class="n">x1</span><span class="p">,</span> <span class="n">y1</span><span class="p">,</span> <span class="n">x2</span><span class="p">,</span> <span class="n">y2</span> <span class="o">=</span> <span class="n">bbox</span>
    <span class="n">frame_w</span><span class="p">,</span> <span class="n">frame_h</span> <span class="o">=</span> <span class="n">camera</span><span class="p">.</span><span class="n">RESOLUTION</span>
    <span class="n">center_x</span> <span class="o">=</span> <span class="p">(</span><span class="n">x1</span> <span class="o">+</span> <span class="n">x2</span><span class="p">)</span> <span class="o">/</span> <span class="mi">2</span>
    <span class="n">box_h</span>    <span class="o">=</span> <span class="nb">max</span><span class="p">(</span><span class="mi">1</span><span class="p">,</span> <span class="n">y2</span> <span class="o">-</span> <span class="n">y1</span><span class="p">)</span>

    <span class="n">offset</span>     <span class="o">=</span> <span class="p">(</span><span class="n">center_x</span> <span class="o">-</span> <span class="n">frame_w</span> <span class="o">/</span> <span class="mi">2</span><span class="p">)</span> <span class="o">/</span> <span class="p">(</span><span class="n">frame_w</span> <span class="o">/</span> <span class="mi">2</span><span class="p">)</span>  <span class="c1"># -1 .. +1
</span>    <span class="n">size_ratio</span> <span class="o">=</span> <span class="n">box_h</span> <span class="o">/</span> <span class="n">frame_h</span>                             <span class="c1"># 0 .. 1
</span>
    <span class="n">turn</span>     <span class="o">=</span> <span class="nb">max</span><span class="p">(</span><span class="o">-</span><span class="mi">100</span><span class="p">,</span> <span class="nb">min</span><span class="p">(</span><span class="mi">100</span><span class="p">,</span> <span class="n">offset</span> <span class="o">*</span> <span class="n">TURN_GAIN</span><span class="p">))</span>
    <span class="n">throttle</span> <span class="o">=</span> <span class="nb">max</span><span class="p">(</span><span class="mi">0</span><span class="p">,</span> <span class="nb">min</span><span class="p">(</span><span class="n">MAX_THROTTLE</span><span class="p">,</span>
                          <span class="p">(</span><span class="n">TARGET_SIZE_RATIO</span> <span class="o">-</span> <span class="n">size_ratio</span><span class="p">)</span> <span class="o">/</span> <span class="n">TARGET_SIZE_RATIO</span> <span class="o">*</span> <span class="n">MAX_THROTTLE</span><span class="p">))</span>
    <span class="k">return</span> <span class="n">turn</span><span class="p">,</span> <span class="n">throttle</span>
</code></pre></div></div>

<p><code class="language-plaintext highlighter-rouge">turn</code>/<code class="language-plaintext highlighter-rouge">throttle</code> go through the exact same <code class="language-plaintext highlighter-rouge">mix_drive()</code> the joystick
posts through from <a href="https://community.element14.com/challenges-projects/design-challenges/ez-ev-challenge/f/forum/57174/hall-w-ev---post-3---joystick-control">two posts ago</a> — one function, one
place that knows how a turn+throttle pair becomes two wheel speeds,
whether a human or a neural network produced them. <code class="language-plaintext highlighter-rouge">MAX_THROTTLE</code> is
capped well under full speed on purpose — this thing drives itself with
nothing watching for obstacles, no reason to let it move at joystick
speeds.</p>

<h2 id="what-actually-broke-on-real-hardware">What actually broke on real hardware</h2>

<p>First real test went nowhere: <code class="language-plaintext highlighter-rouge">App.run()</code> never scheduled
<code class="language-plaintext highlighter-rouge">VideoObjectDetection</code>’s background loops, since the brick got built (on
its own thread, after <code class="language-plaintext highlighter-rouge">App.run()</code> had already started) too late for the
scheduler to notice — confirmed by the sidecar sitting there waiting for a
connection that never came. Fixed by just running those two loops
ourselves in plain daemon threads instead.</p>

<h2 id="seeing-what-its-actually-seeing">Seeing what it’s actually seeing</h2>

<p>Once frames were flowing, the ball’s box kept flickering against other
objects (a bed, a cup) even on a dead-static scene — turned out to be real
per-frame confidence noise, not a “one object at a time” limitation (it’s
a genuine multi-object detector, and no, it can’t be restricted to only
look for balls — fixed 80-class model, no filter option). Fix: draw a box
for everything it sees, not just the ball, and fade them out over a few
seconds instead of hard-cutting the instant one frame doesn’t reconfirm
them.</p>

<h2 id="the-lost-the-ball-behavior-that-didnt-need-writing">The “lost the ball” behavior that didn’t need writing</h2>

<p>Didn’t need a lost-ball timeout — <a href="https://community.element14.com/challenges-projects/design-challenges/ez-ev-challenge/f/forum/57131/hall-w-ev-post-1---the-wheels-are-turning-mostly">Post 1</a>’s STM32
watchdog already stops the wheels when commands stop arriving, same as a
dropped wifi connection, for free.</p>

<h2 id="it-worked--and-then-drove-straight-past-the-ball">It worked — and then drove straight past the ball</h2>

<p>Reacting to every single detection message overshot the ball almost every
time — no braking distance. Fixed by pulsing instead: one short move,
stop, pause, then decide again from a fresh look — and <code class="language-plaintext highlighter-rouge">VideoObjectDetection</code>’s
own per-label lock already discards anything that arrives mid-pause, so no
new state machine was needed to make that stick.</p>

<video width="740" controls="">
  <source src="/hall-w-EV/assets/20260816_hall-w-EV-chase-ball.mp4" type="video/mp4" />
  Your browser does not support the video tag.
</video>

<h2 id="whats-next">What’s next</h2>

<p>Well that’s kind of it. Thrilled at how far we got to an actual auto driving EV.</p>

<h2 id="the-codes">The codes</h2>

<ul>
  <li><a href="https://github.com/tamadillo/hall-w-EV">https://github.com/tamadillo/hall-w-EV</a></li>
</ul>

<p>— <a href="https://github.com/hambreros">Hambreros</a> (and <a href="https://github.com/tamadillo">Tamadillo</a>)</p>]]></content><author><name></name></author><category term="post" /><category term="vision" /><category term="autonomy" /><summary type="html"><![CDATA[Hi again, it’s Hambreros and Tamadillo. Last post gave it eyes. This one gives it something to do with them: place a tennis ball 🎾 in front of it and the robot drives itself towards it, no hands.]]></summary></entry><entry><title type="html">Project HALL-w-EV - Autonomous vehicle</title><link href="https://tamadillo.github.io/hall-w-EV/post/project/2026/08/16/project-HALL-w-EV-autonomous_vehicle.html" rel="alternate" type="text/html" title="Project HALL-w-EV - Autonomous vehicle" /><published>2026-08-16T19:00:00+10:00</published><updated>2026-08-16T19:00:00+10:00</updated><id>https://tamadillo.github.io/hall-w-EV/post/project/2026/08/16/project-HALL-w-EV-autonomous_vehicle</id><content type="html" xml:base="https://tamadillo.github.io/hall-w-EV/post/project/2026/08/16/project-HALL-w-EV-autonomous_vehicle.html"><![CDATA[<p>Hi, it’s <a href="https://github.com/hambreros">Hambreros</a> and <a href="https://github.com/tamadillo">Tamadillo</a>. We set
out to have a bit of fun creating an autonomous vehicle with not much more than
an UNO Q and a few bits of wire. There wasn’t much hard core electronics in
wiring up 2 servos, but there was a bunch of code we had to figure out to make
it work.</p>

<h2 id="what-we-set-out-to-do">What we set out to do</h2>

<p>The pitch was simple: enter the <a href="https://community.element14.com/challenges-projects/design-challenges/ez-ev-challenge">Element14 EZ-EV challenge</a>, build
a little robot that can drive itself down a hallway, and see how far “one
15-year-old, one 18-year-old sister filling in the official entry-age box,
and an Arduino UNO Q” could get in a few weeks. We even wrote ourselves a
five-post plan before touching a soldering iron:</p>

<ol>
  <li>Basic motion primitives</li>
  <li>Remote control over the web (camera + WASD, “puppy on a leash”)</li>
  <li>Simple autonomy (line-following down the hallway with tape)</li>
  <li>Expand driving (manual override on top of the autonomous line-follower)</li>
  <li>Pick one: better telemetry, voice command, or corner-mapping</li>
</ol>

<p>Reasonable plan. Didn’t survive contact with the actual robot.</p>

<h2 id="what-we-actually-built">What we actually built</h2>

<ul>
  <li>
    <p><strong><a href="https://community.element14.com/challenges-projects/design-challenges/ez-ev-challenge/f/forum/57131/hall-w-ev-post-1---the-wheels-are-turning-mostly">Post 1</a> — wheels turning.</strong> Two continuous-rotation
servos, bit-banged PWM because the board’s hardware PWM pins are locked
to the wrong frequency, a web page with a slider per wheel, and a
1-second no-command watchdog on the STM32 side that turned out to be the
single most-reused idea in the whole project.</p>

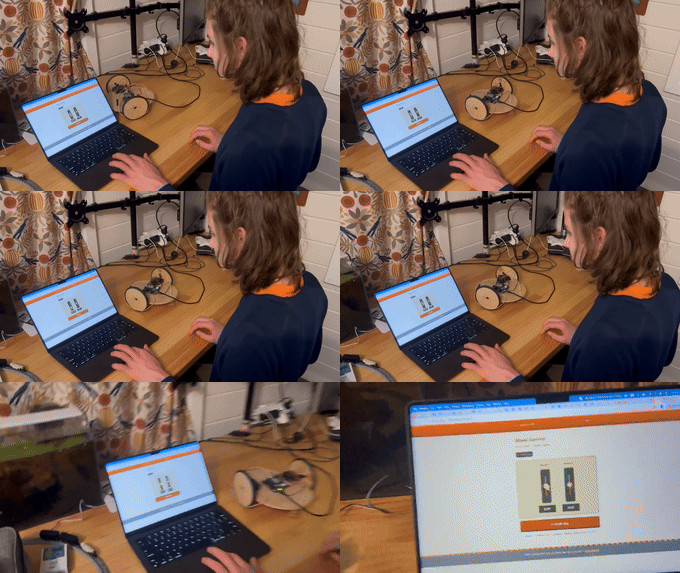
    <p><img src="/hall-w-EV/assets/20260726_basic_wheel_motion_via_web_clip.gif" width="640" alt="wheels are moving" /></p>
  </li>
  <li>
    <p><strong><a href="https://community.element14.com/challenges-projects/design-challenges/ez-ev-challenge/f/forum/57173/hall-w-ev---post-2---giving-the-robot-a-voice">Post 2</a> — a voice, a siren, and lasers.</strong> Not
autonomy. Sound. A whole soundboard — effects, an air-raid siren, an
AusAlert tone, text-to-speech, cruising music — because we went looking
for a way to stabilize the chassis with pantograph legs, gave up on that,
and got distracted by making the thing loud instead.</p>

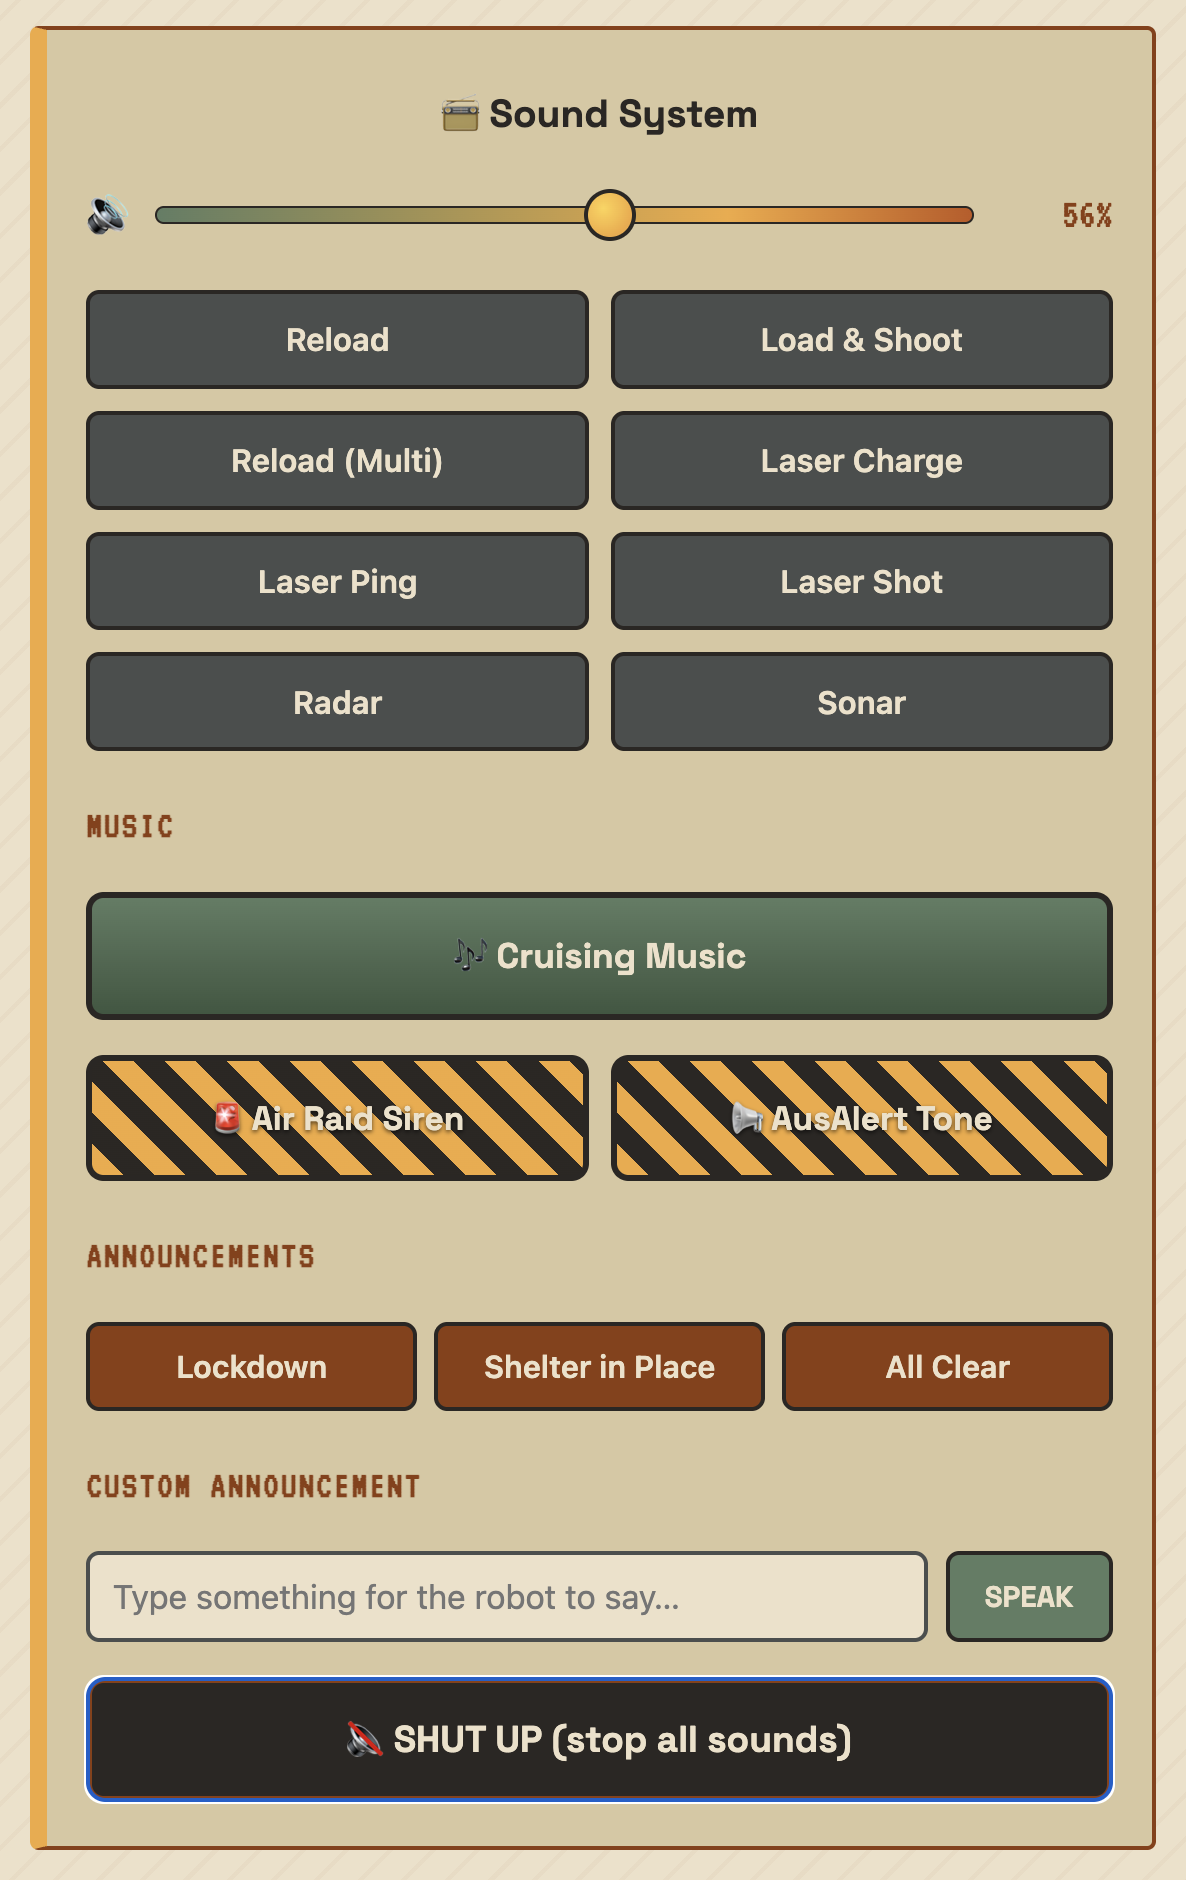
    <p><img src="/hall-w-EV/assets/20260813_soundboard_overview.png" width="640" alt="soundboard" /></p>
  </li>
  <li>
    <p><strong><a href="https://community.element14.com/challenges-projects/design-challenges/ez-ev-challenge/f/forum/57174/hall-w-ev---post-3---joystick-control">Post 3</a> — one joystick instead of two sliders.</strong>
Drag it, or drive with WASD/vim keys, plus every bug that comes with
actually connecting two wheels at once for the first time.</p>

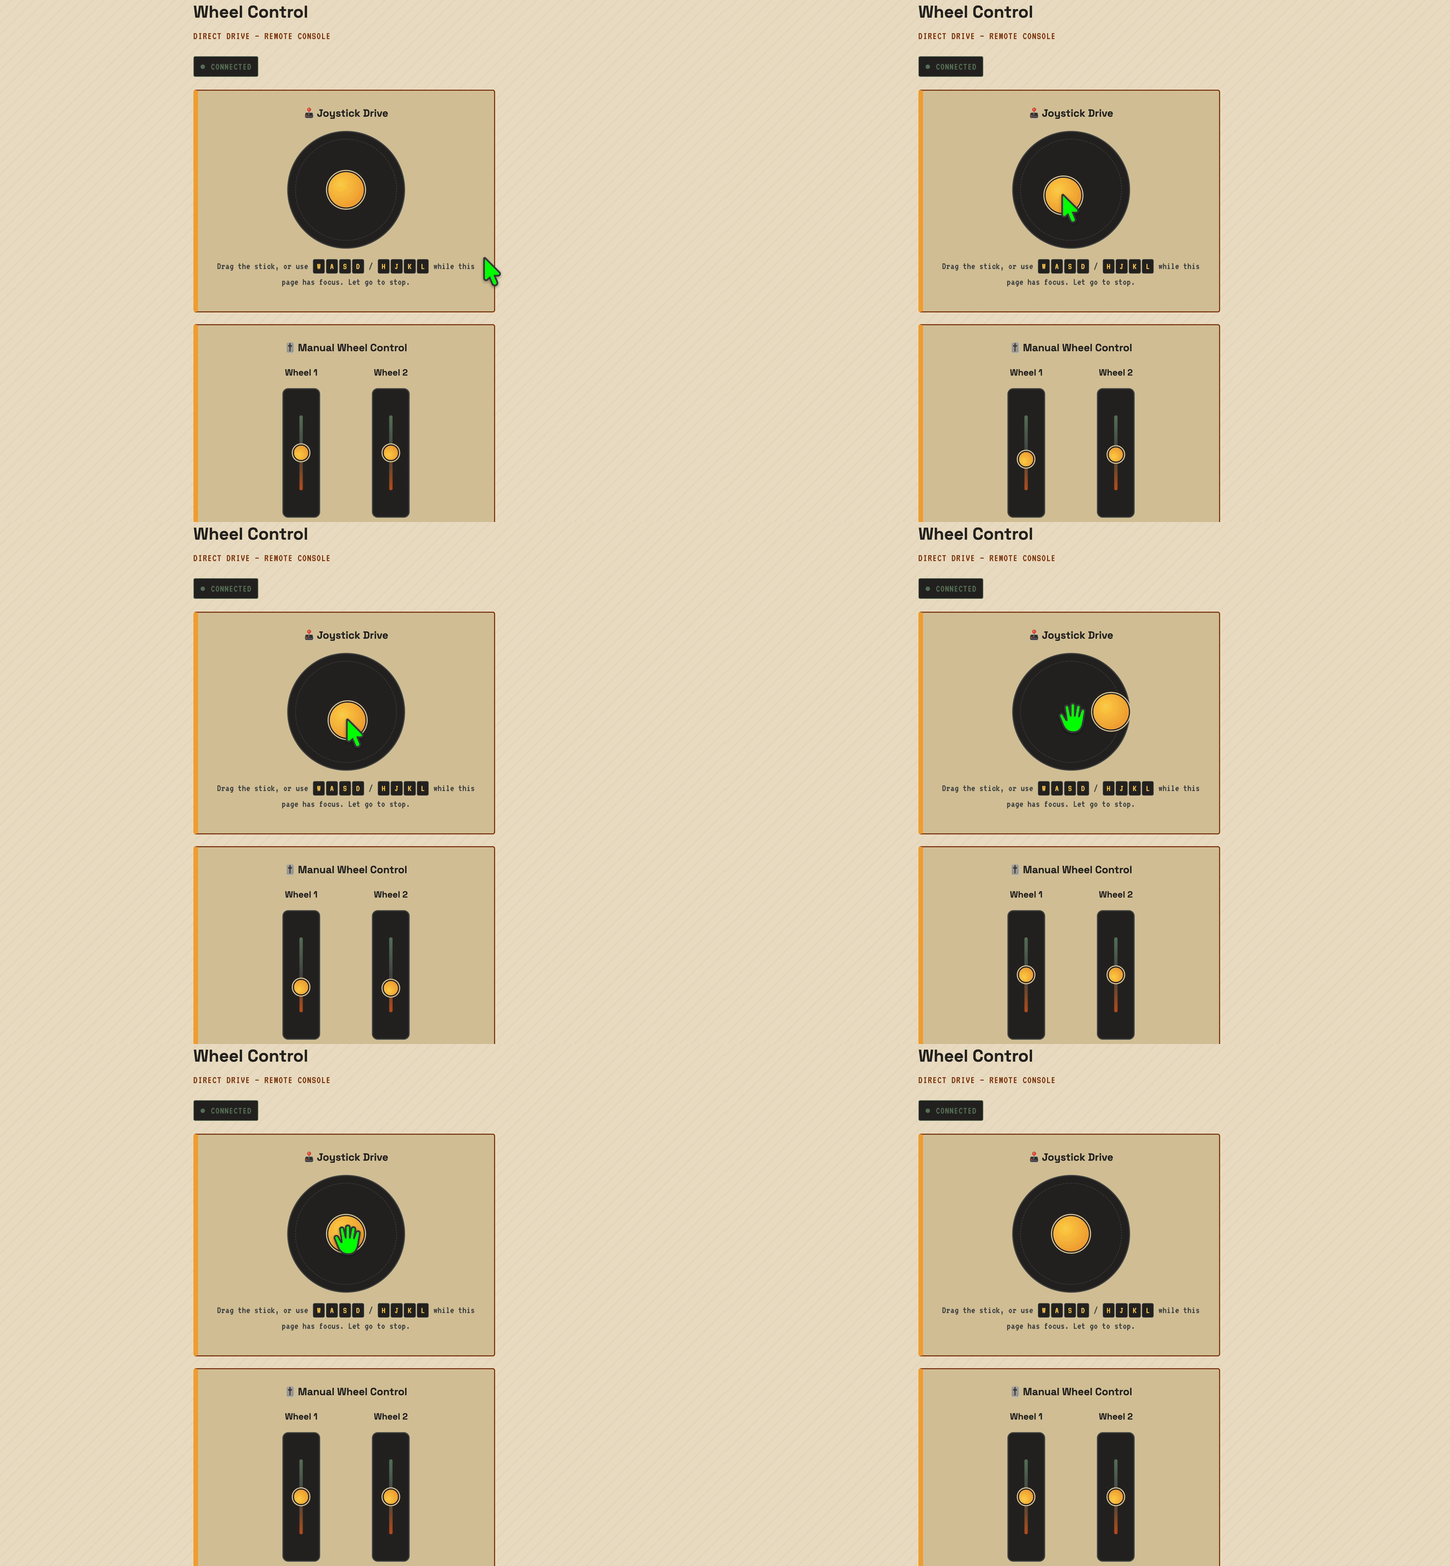
    <p><img src="/hall-w-EV/assets/20260813_02_joystick_controls.gif" width="640" alt="wheels are moving" /></p>
  </li>
  <li>
    <p><strong><a href="https://community.element14.com/challenges-projects/design-challenges/ez-ev-challenge/f/forum/57184/hall-w-ev---post-4---giving-it-eyes">Post 4</a> — eyes.</strong> A live MJPEG camera feed, the
“puppy on a leash” idea from the original plan, just three posts later
than scheduled and built entirely differently than imagined.</p>

    <p><img src="/hall-w-EV/assets/20260816_hall-w-EV-w-camera_clip.gif" width="640" alt="Live camera feed on the control page" /></p>
  </li>
  <li>
    <p><strong><a href="https://community.element14.com/challenges-projects/design-challenges/ez-ev-challenge/f/forum/57185/hall-w-ev---post-5---chase-ball">Post 5</a> — chasing a tennis ball.</strong> Not the line
down the hallway the plan called for — real on-device object detection,
a pretrained neural network finding a “sports ball” and the robot
driving itself towards it.</p>

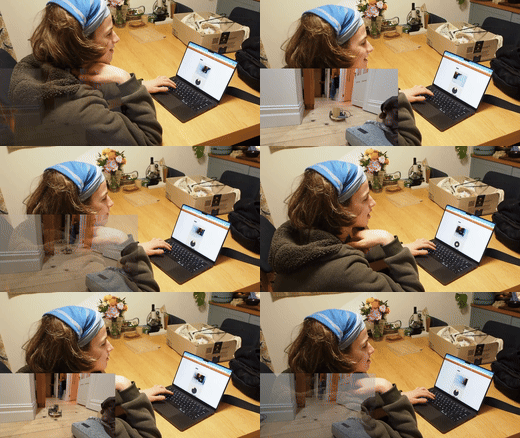
    <p><img src="/hall-w-EV/assets/20260816_hall-w-EV-chase-ball_clip.gif" width="640" alt="Robot autonomously driving towards a tennis ball" /></p>
  </li>
</ul>

<p>Zero hallway tape was harmed in the making of this project.</p>

<h2 id="thanks-for-reading">Thanks for reading</h2>

<p>Five posts, one robot, a lot more debugging than either of us expected
going in. Whatever comes next for Hall-w-EV, it’ll probably also replace
whatever we plan to do with something we didn’t expect — and that’s kind
of the whole point.</p>

<h2 id="the-codes">The codes</h2>

<ul>
  <li><a href="https://github.com/tamadillo/hall-w-EV">https://github.com/tamadillo/hall-w-EV</a></li>
</ul>

<p>— <a href="https://github.com/hambreros">Hambreros</a> (and <a href="https://github.com/tamadillo">Tamadillo</a>)</p>]]></content><author><name></name></author><category term="post" /><category term="project" /><summary type="html"><![CDATA[Hi, it’s Hambreros and Tamadillo. We set out to have a bit of fun creating an autonomous vehicle with not much more than an UNO Q and a few bits of wire. There wasn’t much hard core electronics in wiring up 2 servos, but there was a bunch of code we had to figure out to make it work.]]></summary></entry><entry><title type="html">Post 4 - Giving it eyes (a live camera feed)</title><link href="https://tamadillo.github.io/hall-w-EV/post/camera/web-control/2026/08/14/post-4-live-camera-feed.html" rel="alternate" type="text/html" title="Post 4 - Giving it eyes (a live camera feed)" /><published>2026-08-14T20:00:00+10:00</published><updated>2026-08-14T20:00:00+10:00</updated><id>https://tamadillo.github.io/hall-w-EV/post/camera/web-control/2026/08/14/post-4-live-camera-feed</id><content type="html" xml:base="https://tamadillo.github.io/hall-w-EV/post/camera/web-control/2026/08/14/post-4-live-camera-feed.html"><![CDATA[<p>Hi again, it’s <a href="https://github.com/hambreros">Hambreros</a> and <a href="https://github.com/tamadillo">Tamadillo</a>.
Last post ended with <a href="https://community.element14.com/challenges-projects/design-challenges/ez-ev-challenge/f/forum/57174/hall-w-ev---post-3---joystick-control">a promise</a>: the joystick makes driving
nicer, but you’re still driving blind. So a USB webcam went on, and the
control page now shows what the robot sees.</p>

<h2 id="what-weve-actually-built">What we’ve actually built</h2>

<p>A live video feed right on the same page as the joystick — the “puppy on a
leash from your phone” post the original plan called for, minus the actual
leash. Point the robot somewhere without needing to be in the room with it.</p>

<h2 id="checking-what-the-framework-already-gives-you">Checking what the framework already gives you</h2>

<p>Same move as the <a href="https://community.element14.com/challenges-projects/design-challenges/ez-ev-challenge/f/forum/57173/hall-w-ev---post-2---giving-the-robot-a-voice">TTS detour</a>: before writing any camera code,
went and read <a href="https://github.com/arduino/app-bricks-py">arduino/app-bricks-py</a> to see what Arduino
already ships. Turned out <code class="language-plaintext highlighter-rouge">app_peripherals/camera</code> is a whole unified
abstraction — one <code class="language-plaintext highlighter-rouge">Camera</code> class covering CSI, USB (V4L), IP, and even
WebSocket sources, same family as the <code class="language-plaintext highlighter-rouge">Speaker</code> peripheral the sound system
already uses:</p>

<div class="language-python highlighter-rouge"><div class="highlight"><pre class="highlight"><code><span class="kn">from</span> <span class="nn">arduino.app_peripherals.camera</span> <span class="kn">import</span> <span class="n">Camera</span>

<span class="n">camera</span> <span class="o">=</span> <span class="n">Camera</span><span class="p">(</span><span class="s">"usb:0"</span><span class="p">,</span> <span class="n">resolution</span><span class="o">=</span><span class="p">(</span><span class="mi">640</span><span class="p">,</span> <span class="mi">480</span><span class="p">),</span> <span class="n">fps</span><span class="o">=</span><span class="mi">15</span><span class="p">)</span>
<span class="n">camera</span><span class="p">.</span><span class="n">start</span><span class="p">()</span>
<span class="n">frame</span> <span class="o">=</span> <span class="n">camera</span><span class="p">.</span><span class="n">capture</span><span class="p">()</span>   <span class="c1"># numpy array, or None
# or: for frame in camera.stream(): ...
</span></code></pre></div></div>

<p>Since <code class="language-plaintext highlighter-rouge">Speaker</code> was already confirmed bundled in this app’s base container
with zero extra install, betting <code class="language-plaintext highlighter-rouge">Camera</code> is too — no new brick, no sidecar
container, just a normal peripheral call from our own code. The only actual
new dependency is <code class="language-plaintext highlighter-rouge">opencv-python-headless</code>, for turning each frame into a
JPEG.</p>

<h2 id="the-dumbest-frontend-that-works">The dumbest frontend that works</h2>

<p>The tempting-but-overbuilt version of this involves a <code class="language-plaintext highlighter-rouge">&lt;canvas&gt;</code>, a
WebSocket, and a JS render loop pulling frames off it. Skipped all of that:</p>

<div class="language-html highlighter-rouge"><div class="highlight"><pre class="highlight"><code><span class="nt">&lt;img</span> <span class="na">id=</span><span class="s">"cameraFeed"</span> <span class="na">src=</span><span class="s">"/api/camera/stream"</span> <span class="na">alt=</span><span class="s">"Live camera feed"</span><span class="nt">&gt;</span>
</code></pre></div></div>

<p>That’s the entire client-side video pipeline. <code class="language-plaintext highlighter-rouge">GET /api/camera/stream</code>
returns <code class="language-plaintext highlighter-rouge">multipart/x-mixed-replace</code> — a boundary-delimited stream of JPEG
frames — and browsers have known how to render that straight into an
<code class="language-plaintext highlighter-rouge">&lt;img&gt;</code> tag since basically forever. No JS needed for the video itself, just
a listener on the <code class="language-plaintext highlighter-rouge">error</code> event for when there’s no camera to show:</p>

<div class="language-js highlighter-rouge"><div class="highlight"><pre class="highlight"><code><span class="nx">cameraFeed</span><span class="p">.</span><span class="nx">addEventListener</span><span class="p">(</span><span class="dl">'</span><span class="s1">error</span><span class="dl">'</span><span class="p">,</span> <span class="p">()</span> <span class="o">=&gt;</span> <span class="p">{</span>
  <span class="nx">cameraFeed</span><span class="p">.</span><span class="nx">style</span><span class="p">.</span><span class="nx">display</span> <span class="o">=</span> <span class="dl">'</span><span class="s1">none</span><span class="dl">'</span><span class="p">;</span>
  <span class="nx">fetch</span><span class="p">(</span><span class="dl">'</span><span class="s1">/api/camera/status</span><span class="dl">'</span><span class="p">).</span><span class="nx">then</span><span class="p">(</span><span class="nx">r</span> <span class="o">=&gt;</span> <span class="nx">r</span><span class="p">.</span><span class="nx">json</span><span class="p">()).</span><span class="nx">then</span><span class="p">(</span><span class="nx">data</span> <span class="o">=&gt;</span> <span class="p">{</span>
    <span class="nx">cameraError</span><span class="p">.</span><span class="nx">hidden</span> <span class="o">=</span> <span class="kc">false</span><span class="p">;</span>
    <span class="nx">cameraError</span><span class="p">.</span><span class="nx">textContent</span> <span class="o">=</span> <span class="nx">data</span><span class="p">.</span><span class="nx">error</span> <span class="o">||</span> <span class="dl">'</span><span class="s1">camera stream unavailable</span><span class="dl">'</span><span class="p">;</span>
  <span class="p">});</span>
<span class="p">});</span>
</code></pre></div></div>

<p>Same “surface the real reason, not a cryptic broken icon” instinct as the
sound system’s error banner from a couple of posts back.</p>

<h2 id="starting-the-camera-without-blocking-everything-else">Starting the camera without blocking everything else</h2>

<p><code class="language-plaintext highlighter-rouge">Camera.start()</code> has its own connection retry loop with exponential
backoff — reasonable for “give the USB device a moment to enumerate,” bad
if it’s sitting on the same startup path as the wheel and sound APIs. A
slow or missing camera shouldn’t hold up driving the robot.</p>

<p>So <code class="language-plaintext highlighter-rouge">python/camera.py</code> kicks off <code class="language-plaintext highlighter-rouge">Camera(...).start()</code> on a background
thread at import time, mirroring <code class="language-plaintext highlighter-rouge">sounds.py</code>’s general shape:</p>

<div class="language-python highlighter-rouge"><div class="highlight"><pre class="highlight"><code><span class="k">def</span> <span class="nf">_start</span><span class="p">():</span>
    <span class="k">global</span> <span class="n">_camera</span><span class="p">,</span> <span class="n">_error</span>
    <span class="k">try</span><span class="p">:</span>
        <span class="n">cam</span> <span class="o">=</span> <span class="n">Camera</span><span class="p">(</span><span class="n">SOURCE</span><span class="p">,</span> <span class="n">resolution</span><span class="o">=</span><span class="n">RESOLUTION</span><span class="p">,</span> <span class="n">fps</span><span class="o">=</span><span class="n">FPS</span><span class="p">)</span>
        <span class="n">cam</span><span class="p">.</span><span class="n">start</span><span class="p">()</span>
        <span class="n">_camera</span> <span class="o">=</span> <span class="n">cam</span>
    <span class="k">except</span> <span class="nb">Exception</span> <span class="k">as</span> <span class="n">e</span><span class="p">:</span>
        <span class="n">_error</span> <span class="o">=</span> <span class="nb">str</span><span class="p">(</span><span class="n">e</span><span class="p">)</span>

<span class="n">threading</span><span class="p">.</span><span class="n">Thread</span><span class="p">(</span><span class="n">target</span><span class="o">=</span><span class="n">_start</span><span class="p">,</span> <span class="n">daemon</span><span class="o">=</span><span class="bp">True</span><span class="p">).</span><span class="n">start</span><span class="p">()</span>
</code></pre></div></div>

<p><code class="language-plaintext highlighter-rouge">status()</code> reports <code class="language-plaintext highlighter-rouge">(ok, error)</code> off that shared state, and the stream route
just checks it before handing back the actual <code class="language-plaintext highlighter-rouge">multipart</code> response:</p>

<div class="language-python highlighter-rouge"><div class="highlight"><pre class="highlight"><code><span class="o">@</span><span class="n">web</span><span class="p">.</span><span class="n">route</span><span class="p">(</span><span class="s">'/api/camera/stream'</span><span class="p">)</span>
<span class="k">def</span> <span class="nf">camera_stream</span><span class="p">():</span>
    <span class="n">ok</span><span class="p">,</span> <span class="n">error</span> <span class="o">=</span> <span class="n">camera</span><span class="p">.</span><span class="n">status</span><span class="p">()</span>
    <span class="k">if</span> <span class="ow">not</span> <span class="n">ok</span><span class="p">:</span>
        <span class="k">return</span> <span class="n">jsonify</span><span class="p">({</span><span class="s">'ok'</span><span class="p">:</span> <span class="bp">False</span><span class="p">,</span> <span class="s">'error'</span><span class="p">:</span> <span class="n">error</span><span class="p">}),</span> <span class="mi">503</span>
    <span class="k">return</span> <span class="n">Response</span><span class="p">(</span><span class="n">camera</span><span class="p">.</span><span class="n">mjpeg_frames</span><span class="p">(),</span>
                     <span class="n">mimetype</span><span class="o">=</span><span class="s">'multipart/x-mixed-replace; boundary=frame'</span><span class="p">)</span>
</code></pre></div></div>

<p><code class="language-plaintext highlighter-rouge">mjpeg_frames()</code> itself is a small generator wrapping <code class="language-plaintext highlighter-rouge">Camera.stream()</code>,
JPEG-encoding (<code class="language-plaintext highlighter-rouge">cv2.imencode</code>) each frame as it comes.</p>

<video width="740" controls="">
  <source src="/hall-w-EV/assets/20260816_hall-w-EV-w-camera.mp4" type="video/mp4" />
  Your browser does not support the video tag.
</video>

<h2 id="whats-next">What’s next</h2>

<p>Camera’s on, joystick works — next logical step is doing something with the
two together: point-and-drive, or finally trying that on-device object
detection now that we know <code class="language-plaintext highlighter-rouge">UNO Q</code> supports in it’s demo bricks.</p>

<h2 id="the-codes">The codes</h2>

<ul>
  <li><a href="https://github.com/tamadillo/hall-w-EV">https://github.com/tamadillo/hall-w-EV</a></li>
</ul>

<p>— <a href="https://github.com/hambreros">Hambreros</a> (and <a href="https://github.com/tamadillo">Tamadillo</a>)</p>]]></content><author><name></name></author><category term="post" /><category term="camera" /><category term="web-control" /><summary type="html"><![CDATA[Hi again, it’s Hambreros and Tamadillo. Last post ended with a promise: the joystick makes driving nicer, but you’re still driving blind. So a USB webcam went on, and the control page now shows what the robot sees.]]></summary></entry><entry><title type="html">Post 3 - Joystick control (drag it, or WASD / vim keys)</title><link href="https://tamadillo.github.io/hall-w-EV/post/web-control/ui/2026/08/13/post-3-joystick-drive-wasd-vim-keys.html" rel="alternate" type="text/html" title="Post 3 - Joystick control (drag it, or WASD / vim keys)" /><published>2026-08-13T18:00:00+10:00</published><updated>2026-08-13T18:00:00+10:00</updated><id>https://tamadillo.github.io/hall-w-EV/post/web-control/ui/2026/08/13/post-3-joystick-drive-wasd-vim-keys</id><content type="html" xml:base="https://tamadillo.github.io/hall-w-EV/post/web-control/ui/2026/08/13/post-3-joystick-drive-wasd-vim-keys.html"><![CDATA[<p>Hi again, it’s <a href="https://github.com/hambreros">Hambreros</a> and <a href="https://github.com/tamadillo">Tamadillo</a>.
Last post the robot <a href="https://community.element14.com/challenges-projects/design-challenges/ez-ev-challenge/f/forum/57173/hall-w-ev---post-2---giving-the-robot-a-voice">learned to make noise</a>. This one is smaller
but makes the whole thing way more fun to actually drive: a real joystick —
drag it with a mouse or thumb, or just use <code class="language-plaintext highlighter-rouge">WASD</code> / vim-style <code class="language-plaintext highlighter-rouge">hjkl</code> on a
keyboard — instead of wrestling two separate wheel sliders at once.</p>

<h2 id="what-weve-actually-built">What we’ve actually built</h2>

<p>Since <a href="https://community.element14.com/challenges-projects/design-challenges/ez-ev-challenge/f/forum/57131/hall-w-ev-post-1---the-wheels-are-turning-mostly">Post 1</a>, driving meant dragging <strong>two</strong> independent
vertical sliders. Well actually up till now we haven’t connected both servos but
 yeay a slider per wheel like driving a tank, and how do you even control 2
controls with 1 mouse? So the control page now has:</p>

<ul>
  <li>An on-screen joystick pad — drag the stick in any direction, let go and it
springs back to center and stops, same “throttle stick, not a light
switch” feel as the wheel sliders had.</li>
  <li><code class="language-plaintext highlighter-rouge">WASD</code> and vim’s <code class="language-plaintext highlighter-rouge">hjkl</code> both drive the same stick — whichever one you
reach for first works, and they combine, so forward + turn gives you a
proper diagonal instead of a hard pivot.</li>
  <li>The old per-wheel sliders are still there underneath, now relabeled
“Manual Wheel Control” — occasionally useful for trimming one wheel on
its own, but the joystick is the one you actually want to drive with.</li>
</ul>

<p><img src="/hall-w-EV/assets/20260813_02_joystick_controls.gif" alt="" /></p>

<h2 id="keeping-the-mixing-in-one-place">Keeping the mixing in one place</h2>

<p>The tempting shortcut was to do the “turn this drag angle into two wheel
speeds” math in JavaScript and post straight to the existing
<code class="language-plaintext highlighter-rouge">/api/wheel/&lt;n&gt;</code> endpoint per wheel. We didn’t do that — the frontend has
no business knowing how many wheels this thing has or how they’re mixed.
Instead the page posts one thing, <code class="language-plaintext highlighter-rouge">{x, y}</code> (turn, throttle, both
-100..100), to a new <code class="language-plaintext highlighter-rouge">POST /api/drive</code>, and the actual arcade-mixing math
lives entirely on the Python side:</p>

<div class="language-python highlighter-rouge"><div class="highlight"><pre class="highlight"><code><span class="k">def</span> <span class="nf">mix_drive</span><span class="p">(</span><span class="n">x</span><span class="p">,</span> <span class="n">y</span><span class="p">):</span>
    <span class="n">x</span> <span class="o">=</span> <span class="nb">max</span><span class="p">(</span><span class="o">-</span><span class="mi">100</span><span class="p">,</span> <span class="nb">min</span><span class="p">(</span><span class="mi">100</span><span class="p">,</span> <span class="nb">int</span><span class="p">(</span><span class="n">x</span><span class="p">)))</span>
    <span class="n">y</span> <span class="o">=</span> <span class="nb">max</span><span class="p">(</span><span class="o">-</span><span class="mi">100</span><span class="p">,</span> <span class="nb">min</span><span class="p">(</span><span class="mi">100</span><span class="p">,</span> <span class="nb">int</span><span class="p">(</span><span class="n">y</span><span class="p">)))</span>
    <span class="k">return</span> <span class="nb">max</span><span class="p">(</span><span class="o">-</span><span class="mi">100</span><span class="p">,</span> <span class="nb">min</span><span class="p">(</span><span class="mi">100</span><span class="p">,</span> <span class="n">y</span> <span class="o">+</span> <span class="n">x</span><span class="p">)),</span> <span class="nb">max</span><span class="p">(</span><span class="o">-</span><span class="mi">100</span><span class="p">,</span> <span class="nb">min</span><span class="p">(</span><span class="mi">100</span><span class="p">,</span> <span class="n">y</span> <span class="o">-</span> <span class="n">x</span><span class="p">))</span>
</code></pre></div></div>

<p>One function, one place that knows <code class="language-plaintext highlighter-rouge">wheel1 = throttle + turn</code> and
<code class="language-plaintext highlighter-rouge">wheel2 = throttle - turn</code>. If we ever add a third wheel, a different
chassis, or want to curve the turn response, that’s a one-function change,
not a hunt through frontend code.</p>

<h2 id="mirrored-servos-mirrored-bug">Mirrored servos, mirrored bug</h2>

<p>Software done, so time to actually push the stick forward with both wheels
connected at once — first time we’d had them both hooked up and driven
together rather than one at a time. Robot spun in place instead of driving
forward. Wheel 1 was doing exactly what it should; wheel 2 was going
backward.</p>

<p>Both servos are the same part, wired the same way, running the same
firmware — but they’re bolted to opposite sides of the chassis, mirror
image of each other, the same way your left shoe and right shoe are
mirror images built from the same last. “Spin clockwise” looks like
forward from one side and backward from the other, so the exact same
pulse width that drove wheel 1 forward drove wheel 2 in reverse. Nothing
wrong with the mixing math from the last section — <code class="language-plaintext highlighter-rouge">mix_drive()</code> was
handing out perfectly correct forward speeds for both wheels, it’s just
that one wheel’s servo interprets “forward” backwards from the other.</p>

<p>Fixed it at the one point in the firmware that turns a commanded speed
into an actual pulse, not by touching the mixing math or anything
upstream of it:</p>

<div class="language-cpp highlighter-rouge"><div class="highlight"><pre class="highlight"><code><span class="cp">#define WHEEL1_REVERSED false
#define WHEEL2_REVERSED true
</span><span class="p">...</span>
<span class="n">servoFrame</span><span class="p">(</span><span class="n">SERVO1_PIN</span><span class="p">,</span> <span class="n">speedToPulseUs</span><span class="p">(</span><span class="n">WHEEL1_REVERSED</span> <span class="o">?</span> <span class="o">-</span><span class="n">wheel1Speed</span> <span class="o">:</span> <span class="n">wheel1Speed</span><span class="p">),</span>
           <span class="n">SERVO2_PIN</span><span class="p">,</span> <span class="n">speedToPulseUs</span><span class="p">(</span><span class="n">WHEEL2_REVERSED</span> <span class="o">?</span> <span class="o">-</span><span class="n">wheel2Speed</span> <span class="o">:</span> <span class="n">wheel2Speed</span><span class="p">));</span>
</code></pre></div></div>

<p><code class="language-plaintext highlighter-rouge">wheel1Speed</code>/<code class="language-plaintext highlighter-rouge">wheel2Speed</code> themselves — the values the Bridge handlers
store, the values the Python side and the joystick’s arcade mixing both
reason about — still mean “positive is forward” for both wheels. The
mirroring correction is a single negation right at the pulse-generation
step, isolated to the one wheel that’s actually mounted backwards. If it
turns out a future chassis needs the other wheel flipped too (or flipped
back), it’s a one-line change, not a rethink of the mixing.</p>

<h2 id="a-real-off-switch">A real OFF switch</h2>

<p>With the direction sorted, one servo was still making a faint noise even
sitting at commanded speed 0 — the same self-correcting buzz <a href="https://community.element14.com/challenges-projects/design-challenges/ez-ev-challenge/f/forum/57131/hall-w-ev-post-1---the-wheels-are-turning-mostly">Post
1</a> first ran into, just quieter now that both servos are
trimmed better. Trimming the pot gets you close to the servo’s true
center, not exactly onto it, and a held 1500us “stop” pulse still gives
the servo’s internal position-holding loop a target to compare itself
against. Close-but-not-perfect is still enough for it to keep nudging.</p>

<p>So instead of chasing the trim pot further, we added a real motor power
toggle — a button per wheel that does something a commanded speed of 0
can’t: stop sending that servo a pulse train <em>at all</em>.</p>

<div class="language-cpp highlighter-rouge"><div class="highlight"><pre class="highlight"><code><span class="k">static</span> <span class="kt">void</span> <span class="nf">servoFrame</span><span class="p">(</span><span class="kt">int</span> <span class="n">pin1</span><span class="p">,</span> <span class="kt">unsigned</span> <span class="kt">int</span> <span class="n">pulse1Us</span><span class="p">,</span> <span class="kt">bool</span> <span class="n">enable1</span><span class="p">,</span>
                       <span class="kt">int</span> <span class="n">pin2</span><span class="p">,</span> <span class="kt">unsigned</span> <span class="kt">int</span> <span class="n">pulse2Us</span><span class="p">,</span> <span class="kt">bool</span> <span class="n">enable2</span><span class="p">)</span> <span class="p">{</span>
    <span class="k">if</span> <span class="p">(</span><span class="n">enable1</span><span class="p">)</span> <span class="p">{</span>
        <span class="n">digitalWrite</span><span class="p">(</span><span class="n">pin1</span><span class="p">,</span> <span class="n">HIGH</span><span class="p">);</span>
        <span class="n">delayMicroseconds</span><span class="p">(</span><span class="n">pulse1Us</span><span class="p">);</span>
        <span class="n">digitalWrite</span><span class="p">(</span><span class="n">pin1</span><span class="p">,</span> <span class="n">LOW</span><span class="p">);</span>
    <span class="p">}</span>
    <span class="c1">// ...same for pin2/enable2</span>
<span class="p">}</span>
</code></pre></div></div>

<p>No pulse means nothing for the internal loop to react to — quieter than
any stop pulse we could trim to, held or not.</p>

<p>Worth being upfront about what this isn’t: it’s not a real power switch. The
board only ever drove the servo <em>signal</em> line — the 5V rail has always come
straight off the shared supply with no relay or MOSFET in between , so “motor
off” here can’t cut actual voltage to the servo. That would need new hardware —
a MOSFET or relay switched from a spare GPIO — not just a firmware change, so we
deliberately scoped this to the signal-only version rather than reaching for a
soldering iron mid-feature. Given the noise was coming from the <em>signal</em> being
held near-but-not-quite-center rather than from anything drawing power at true
idle, it’s also very likely the actual fix for the buzz, not just a consolation
prize.</p>

<h2 id="holding-a-key-isnt-a-real-browser-event">“Holding a key” isn’t a real browser event</h2>

<p>First pass: listen for <code class="language-plaintext highlighter-rouge">keydown</code>, send the drive command once. Worked for
about half a second — press <code class="language-plaintext highlighter-rouge">w</code> and the robot lurches forward, then stops
on its own even though the key’s still very much held down.</p>

<p>Turns out <code class="language-plaintext highlighter-rouge">keydown</code> fires once per press, and after that the browser’s own
key-repeat kicks in — which is inconsistent across OSes, has a noticeable
initial delay, and isn’t something we should be relying on for “keep the
motor running.” Worse: [Post 1][14-post-1-wheels] built a 1-second watchdog
into the STM32 side specifically so a dropped connection stops the wheels
instead of leaving them spinning — and a <code class="language-plaintext highlighter-rouge">keydown</code> that fires once and then
goes quiet for a while looks exactly like a dropped connection to that
watchdog.</p>

<p>Fix was the same pattern the wheel sliders already used for drag events,
just driven by a timer instead of input events — track which keys are
currently down in a <code class="language-plaintext highlighter-rouge">Set</code>, and re-send the current vector on a plain
interval for as long as any of them are held:</p>

<div class="language-js highlighter-rouge"><div class="highlight"><pre class="highlight"><code><span class="nx">setInterval</span><span class="p">(()</span> <span class="o">=&gt;</span> <span class="p">{</span>
  <span class="k">if</span> <span class="p">(</span><span class="nx">keyboardDriving</span><span class="p">)</span> <span class="nx">drive</span><span class="p">(...</span><span class="nx">keyboardVector</span><span class="p">(),</span> <span class="kc">false</span><span class="p">);</span>
<span class="p">},</span> <span class="nx">SEND_INTERVAL_MS</span><span class="p">);</span>
</code></pre></div></div>

<p><code class="language-plaintext highlighter-rouge">keydown</code>/<code class="language-plaintext highlighter-rouge">keyup</code> just add/remove from the set; the interval is what
actually keeps commands flowing often enough to stay ahead of the
watchdog.</p>

<h2 id="the-keyup-that-never-comes">The keyup that never comes</h2>

<p>Second gotcha, found by alt-tabbing away mid-drive without letting go of
<code class="language-plaintext highlighter-rouge">w</code> first: the robot kept driving. <code class="language-plaintext highlighter-rouge">keyup</code> only fires if the browser is
still the one listening — alt-tab, clicking outside the page, anything
that steals focus, and the browser just stops delivering key events
altogether. No <code class="language-plaintext highlighter-rouge">keyup</code>, so our held-keys set never clears.</p>

<div class="language-js highlighter-rouge"><div class="highlight"><pre class="highlight"><code><span class="nb">window</span><span class="p">.</span><span class="nx">addEventListener</span><span class="p">(</span><span class="dl">'</span><span class="s1">blur</span><span class="dl">'</span><span class="p">,</span> <span class="p">()</span> <span class="o">=&gt;</span> <span class="p">{</span>
  <span class="k">if</span> <span class="p">(</span><span class="nx">pressedKeys</span><span class="p">.</span><span class="nx">size</span> <span class="o">===</span> <span class="mi">0</span><span class="p">)</span> <span class="k">return</span><span class="p">;</span>
  <span class="nx">pressedKeys</span><span class="p">.</span><span class="nx">clear</span><span class="p">();</span>
  <span class="nx">keyboardDriving</span> <span class="o">=</span> <span class="kc">false</span><span class="p">;</span>
  <span class="nx">drive</span><span class="p">(</span><span class="mi">0</span><span class="p">,</span> <span class="mi">0</span><span class="p">,</span> <span class="kc">true</span><span class="p">);</span>
<span class="p">});</span>
</code></pre></div></div>

<p>Losing focus now stops the robot immediately instead of waiting out the
watchdog’s full second — which, at “robot with wheels in a hallway,” felt
like the actually-important version of this bug, not just a nice-to-have.</p>

<video width="740" controls="">
  <source src="/hall-w-EV/assets/20260813_02_demo_joystick_control_web.mp4" type="video/mp4" />
  Your browser does not support the video tag.
</video>

<h2 id="whats-next">What’s next</h2>

<p>The joystick makes driving nicer, but you’re still driving blind — next up
is the camera, so this actually becomes the “puppy on a leash from your
phone” post the original plan promised.</p>

<h2 id="the-codes">The codes</h2>

<ul>
  <li><a href="https://github.com/tamadillo/hall-w-EV">https://github.com/tamadillo/hall-w-EV</a></li>
</ul>

<p>— <a href="https://github.com/hambreros">Hambreros</a> (and <a href="https://github.com/tamadillo">Tamadillo</a>)</p>]]></content><author><name></name></author><category term="post" /><category term="web-control" /><category term="ui" /><summary type="html"><![CDATA[Hi again, it’s Hambreros and Tamadillo. Last post the robot learned to make noise. This one is smaller but makes the whole thing way more fun to actually drive: a real joystick — drag it with a mouse or thumb, or just use WASD / vim-style hjkl on a keyboard — instead of wrestling two separate wheel sliders at once.]]></summary></entry><entry><title type="html">Post 2 - Giving the robot a voice (and a siren, and some lasers)</title><link href="https://tamadillo.github.io/hall-w-EV/post/sound/docker/tts/2026/08/13/post-2-giving-the-robot-a-voice.html" rel="alternate" type="text/html" title="Post 2 - Giving the robot a voice (and a siren, and some lasers)" /><published>2026-08-13T14:00:00+10:00</published><updated>2026-08-13T14:00:00+10:00</updated><id>https://tamadillo.github.io/hall-w-EV/post/sound/docker/tts/2026/08/13/post-2-giving-the-robot-a-voice</id><content type="html" xml:base="https://tamadillo.github.io/hall-w-EV/post/sound/docker/tts/2026/08/13/post-2-giving-the-robot-a-voice.html"><![CDATA[<p>Hi again, it’s <a href="https://github.com/hambreros">Hambreros</a> and <a href="https://github.com/tamadillo">Tamadillo</a>.
Last post the robot learned to roll <a href="https://community.element14.com/challenges-projects/design-challenges/ez-ev-challenge/f/forum/57131/hall-w-ev-post-1---the-wheels-are-turning-mostly">Post 1 - The wheels are turning
(mostly)</a>. This post it learned to make noise — sound
effects, an air raid siren, an announcement system, and it can even talk now.
Getting there was way more of an adventure than the wheels were, mostly because
the bug wasn’t actually a bug, it was a whole container we didn’t know existed.</p>

<h2 id="what-weve-actually-built">What we’ve actually built</h2>

<p>The control web page now has a “Sound System” panel underneath the wheel
controls:</p>

<ul>
  <li>A grid of sound effects like laser blasts and guns reloading</li>
  <li>An <strong>Air Raid Siren</strong>, and an <strong>AusAlert</strong> tone (853Hz and 960Hz played
together) inspired by Australia’s emergency phone-alert system</li>
  <li>Text-to-speech (TTS) announcements — inspired by “Giant Voice” systems
we’ve seen in videos from Middle East conflict zones and school lockdown
drills, telling you to “shelter in place”. Partly inspired by the new
Arduino App Lab update, which mentions TTS bricks.</li>
  <li>A volume slider, and a big <strong>SHUT UP</strong> button, because once you give a
robot a siren you will absolutely need a way to make it stop</li>
</ul>

<p>And most recently: cruising music, so it can play a track while it drives
around. More on why that one was trickier than it sounds in a minute.</p>

<h2 id="hardware-distraction">Hardware distraction</h2>

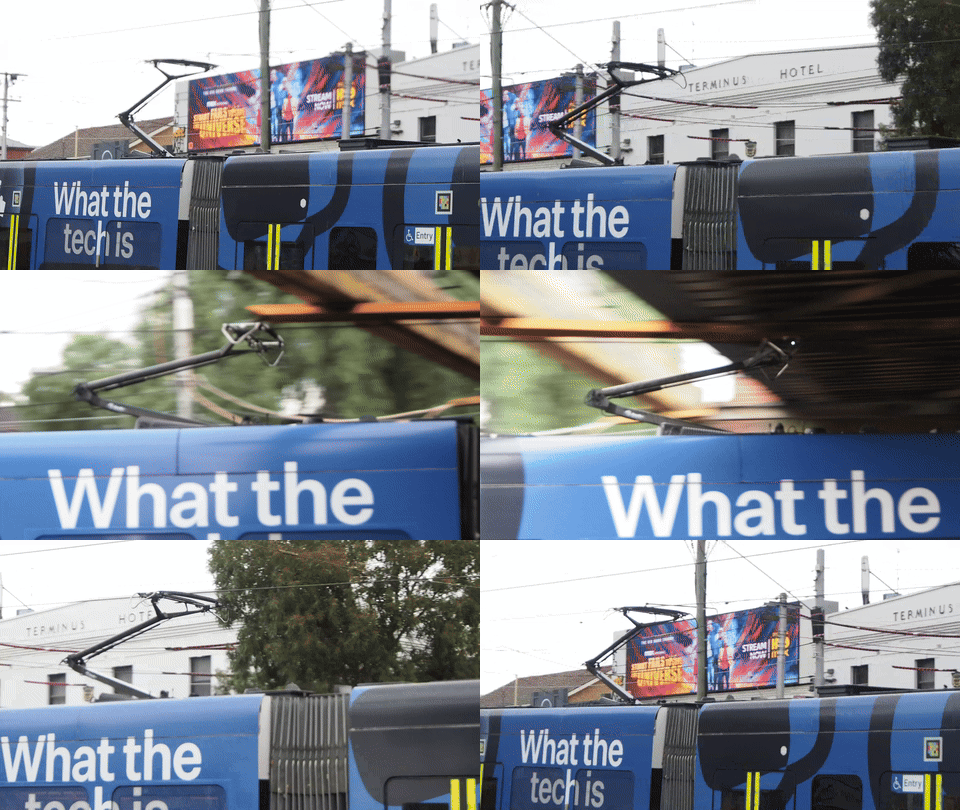
<p>The Braitenberg vehicle chassis we’re using is inherently unstable. Two wheels
and a stopper meant it would often tip during testing. Inspired by the
pantographs on trains that pass our back yard, as well as drones that can land
and stick to a moving object, we tried to build a self-correcting leg system
for our EV.</p>

<p><img src="/hall-w-EV/assets/20260813_tram_pantograph_01.gif" alt="" />
<img src="/hall-w-EV/assets/20260813_tram_pantograph_02.gi" alt="" /></p>

<video width="740" controls="">
  <source src="/hall-w-EV/assets/20260813_drone_land_and_cling_web.mp4" type="video/mp4" />
  Your browser does not support the video tag.
</video>
<p><a href="https://www.instagram.com/p/DboDwK_gXT7">https://www.instagram.com/p/DboDwK_gXT7</a> credit
<a href="https://www.instagram.com/zaruba.tech/">Zaruba</a></p>

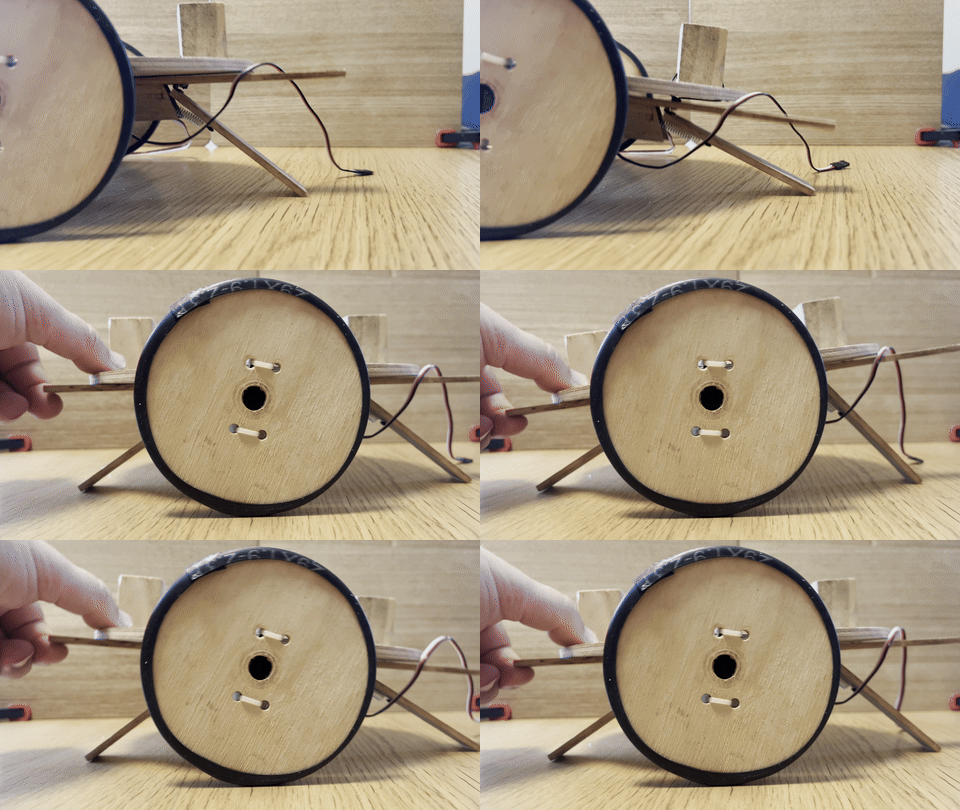
<p>This took a bunch of experimenting and time. In the end the results weren’t
that good, and we realised that once we finally attached a camera to the
setup, we’d also need to compensate and auto-correct the camera to point at
the horizon.</p>

<p><img src="/hall-w-EV/assets/20260813_adjustable_leg_combined.gif" alt="" /></p>

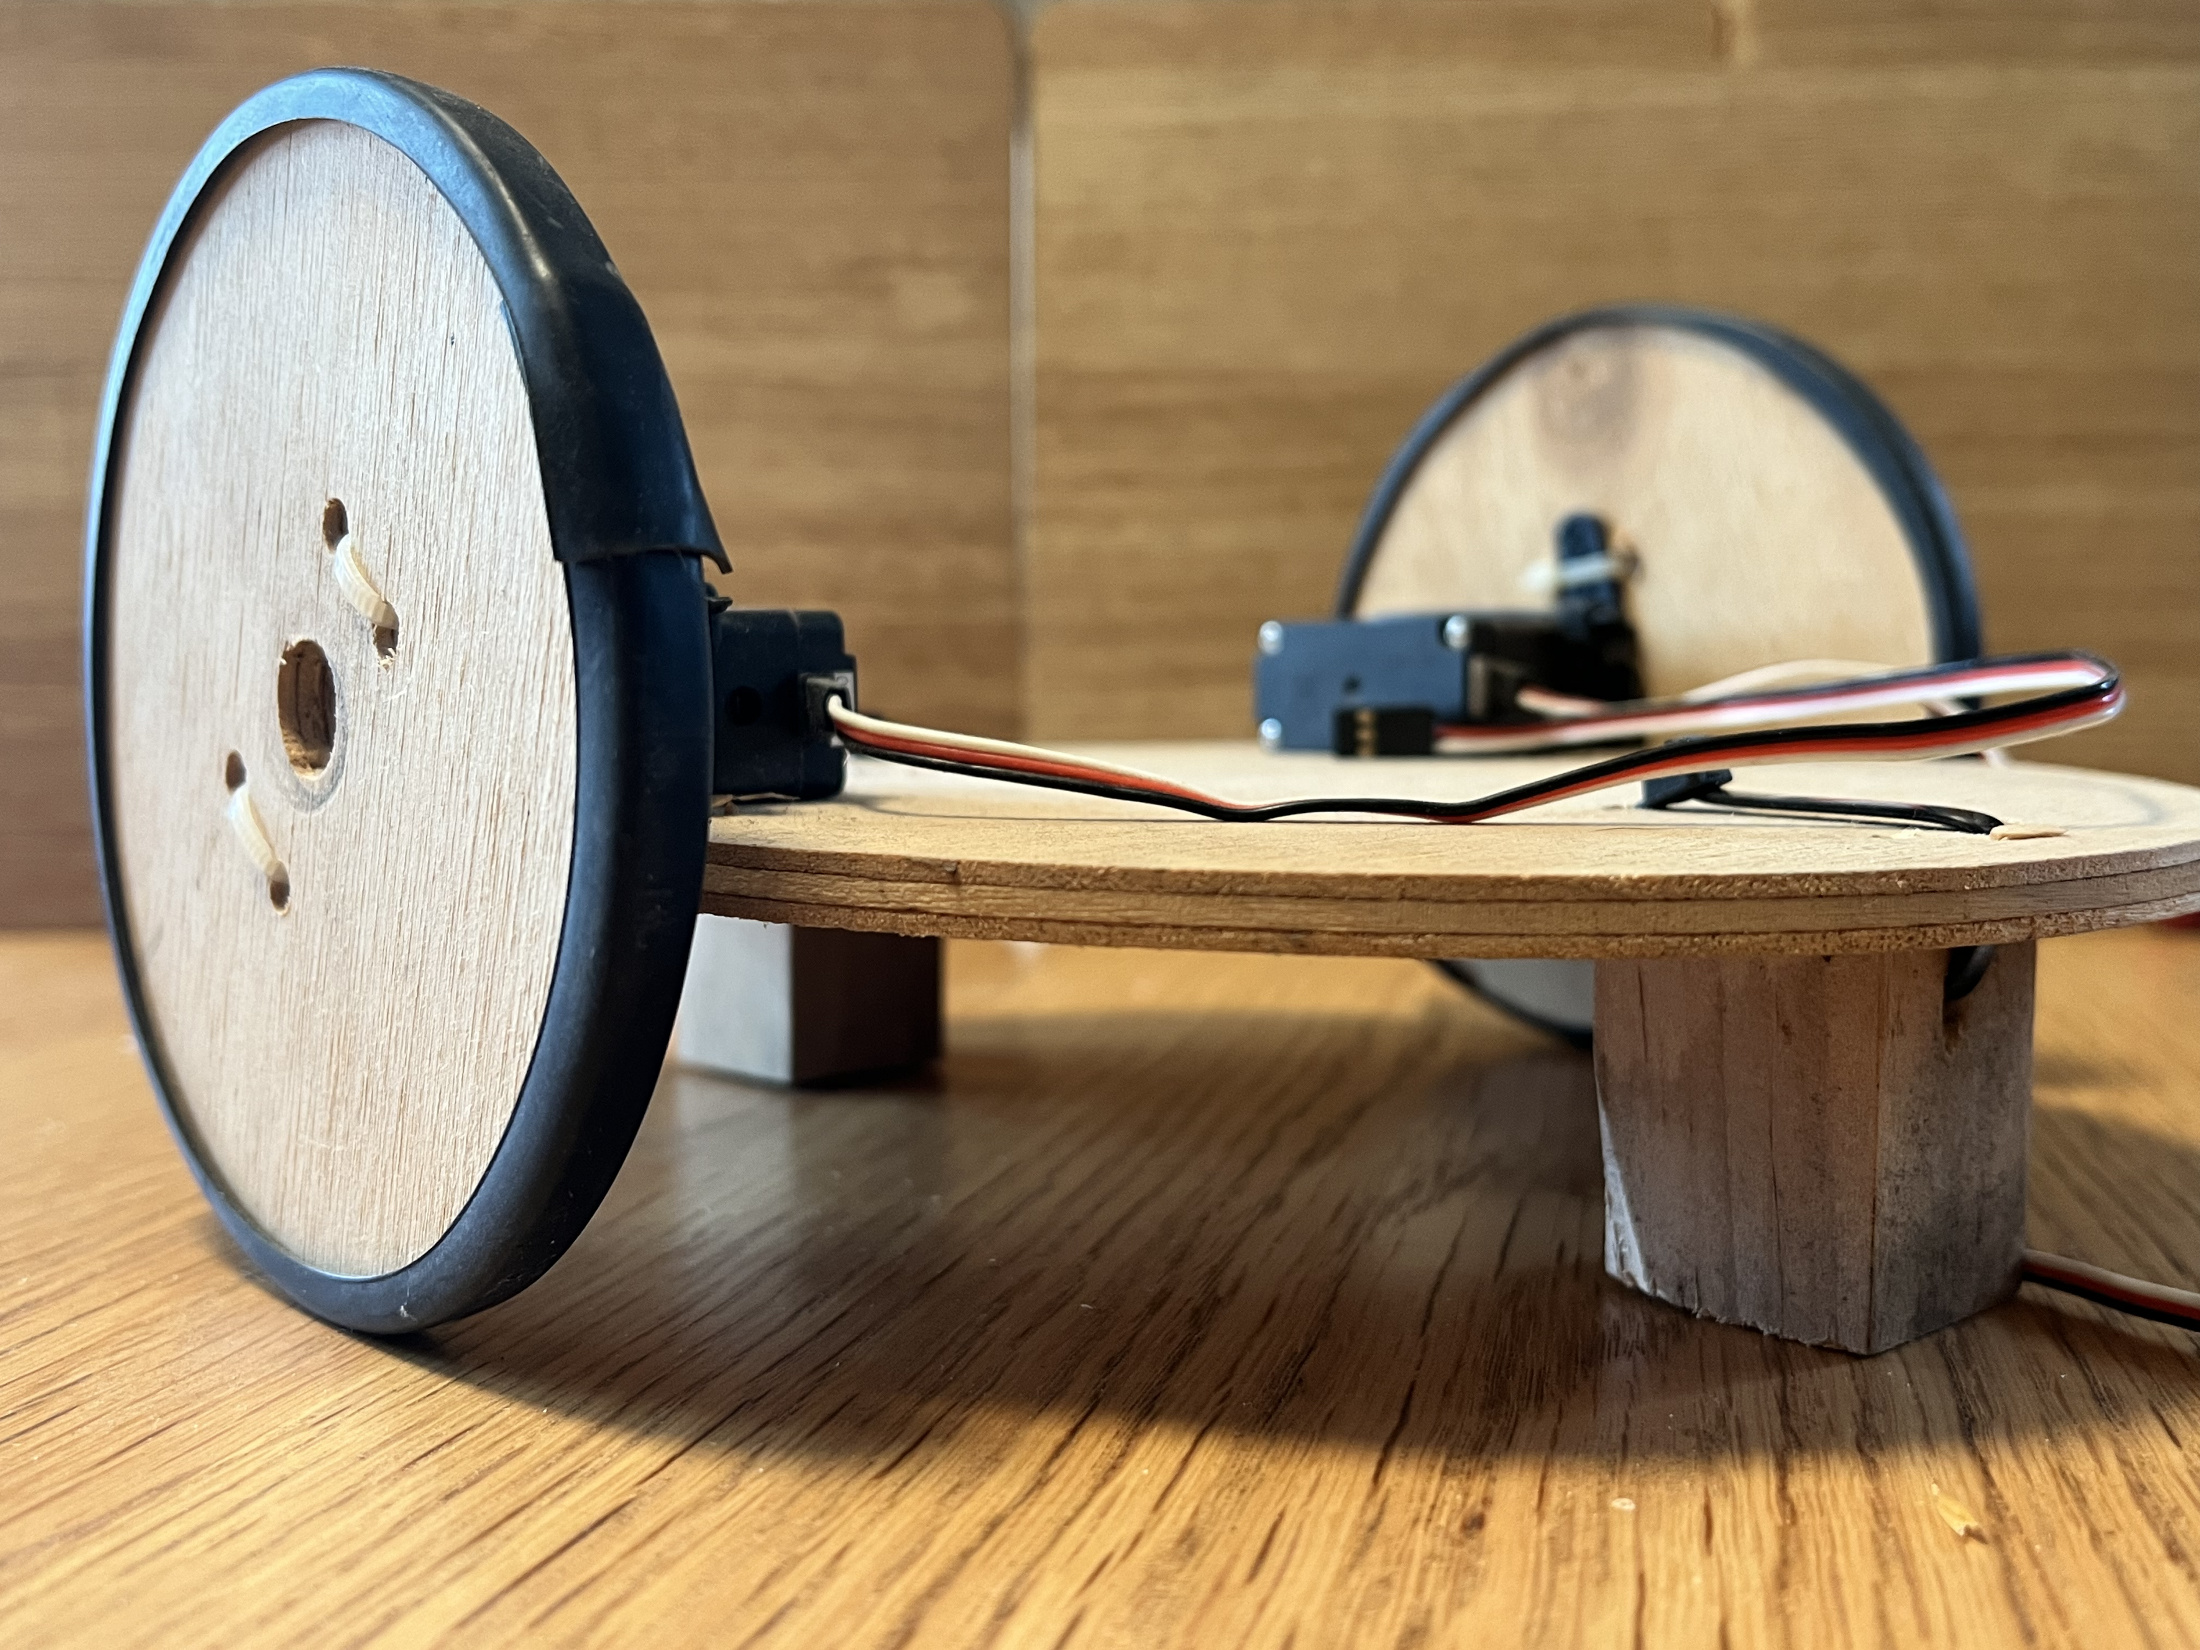
<p>In the end we dropped the idea and moved on with a couple of wooden blocks.</p>

<p><img src="/hall-w-EV/assets/20260813_block_legs.jpg" alt="" /></p>

<h2 id="tts-no-work">TTS no work</h2>

<p>As the UNO Q updated to the latest firmware of Arduino App Lab, we got briefly
excited that there might also be a <em>neural</em> text-to-speech option built in (an
actual AI voice model instead of the classic robot monotone) — and there is one,
<code class="language-plaintext highlighter-rouge">arduino:tts</code>. Got all the way to testing it before finding out it’s built
specifically for the new <code class="language-plaintext highlighter-rouge">Ventuno Q</code> board and not supported by the <code class="language-plaintext highlighter-rouge">UNO Q</code>.</p>

<p>Turns out Arduino just announced the <a href="https://community.element14.com/products/arduino/b/blog/posts/arduino-ventuno">VENTUNO Q</a>. Our UNO Q
has 2GB of RAM and no AI chip. VENTUNO Q packs a <strong>Qualcomm Dragonwing IQ‑8275</strong>
— a proper 40 TOPS neural processor — plus 16GB of RAM, specifically so it can
run real local AI: computer vision, <a href="https://community.element14.com/products/roadtest/rt/roadtests/722/roadtest-open-call?CommentId=63a8ef97-9664-436f-a11a-6178ed0f25c8">offline AI assistants running local speech
models</a>, that kind of thing. The neural TTS brick we found
needs that NPU to run at all, so on our board it was never going to work — not a
bug, just the wrong hardware for the job. There are a couple of overview videos
from embedded world if you want to see it in action: <a href="https://www.youtube.com/watch?v=gVd1qKlfCyY">developer
walkthrough</a>, <a href="https://www.youtube.com/watch?v=5wYzlrZVPXY">demo reel</a>. But let’s not let
the inspiration of TTS go to waste, after scrounging around we worked out we can
use the unix <code class="language-plaintext highlighter-rouge">espeak-ng</code> for the talking instead.</p>

<p>Here’s where it got interesting. The siren and the AusAlert tone worked first
try. Wav/MP3 Sound effects and text-to-speech? Dead silent. No errors, no sound,
nothing.</p>

<p>First theory: volume. Turned out to be half right — the board’s speaker
volume genuinely was too low by default, and cranking it with <code class="language-plaintext highlighter-rouge">amixer</code>
fixed <em>some</em> of it. But effects and TTS still didn’t work, even after that.</p>

<p>Second theory, once we actually looked: the programs we needed (<code class="language-plaintext highlighter-rouge">mpg123</code> for
mp3s, <code class="language-plaintext highlighter-rouge">espeak-ng</code> for the talking) just weren’t installed. Fair enough, we
thought — <code class="language-plaintext highlighter-rouge">sudo apt-get install</code> them and done. Except we <em>did</em> that, and
<code class="language-plaintext highlighter-rouge">which mpg123</code> on the board clearly showed it existed. So why couldn’t our
own code find it?</p>

<p>Turns out: the robot’s Python code doesn’t actually run directly on the
board’s Linux. It runs <em>inside a Docker container</em> — basically a little
sealed box with its own separate copy of everything. We’d installed the
programs onto the board itself, not into the box our code was actually
running in. Two completely different places, both called “the board” if
you’re not paying attention. Once we <code class="language-plaintext highlighter-rouge">docker exec</code>‘d into the actual
container and installed things there instead, everything clicked into
place — almost. Even <em>that</em> had one more gotcha: the container’s default
user isn’t allowed to install anything (<code class="language-plaintext highlighter-rouge">Permission denied</code> on a folder
called <code class="language-plaintext highlighter-rouge">apt/lists/partial</code>, if you’re curious), so it needed:</p>

<div class="language-sh highlighter-rouge"><div class="highlight"><pre class="highlight"><code>docker <span class="nb">exec</span> <span class="nt">-u</span> root hall-w-ev-main-1 apt-get <span class="nb">install</span> <span class="nt">-y</span> espeak-ng
</code></pre></div></div>

<p><code class="language-plaintext highlighter-rouge">-u root</code> = “no really, let me actually install this.” Small thing, cost us
an hour.</p>

<h2 id="finding-the-good-stuff">Finding the good stuff</h2>

<p>While we were down in that container digging around, we found something way
better than what we were looking for: Arduino ships their own official audio
tools baked right in — <code class="language-plaintext highlighter-rouge">arduino.app_peripherals.speaker.Speaker</code>. It’s a
proper Python class for playing sound directly, no external programs
needed at all.</p>

<p>As mentioned above, the VENTUNO Q’s TTS brick was kind of cool to stumble into
by accident while debugging a sound effect — but a dead end for now. We’re
sticking with the classic robot voice, which honestly suits an
emergency-siren robot better anyway.</p>

<p>Since the <a href="https://github.com/arduino/app-bricks-py/tree/main/src/arduino/app_bricks/tts">TTS brick’s code is public</a>, we went and actually
read it out of curiosity, and it turns out it does basically the same
chunk-and-check-cancelled trick we were about to build by hand, just with a
lot more going on underneath:</p>

<ul>
  <li>It doesn’t run the AI voice model in the same program at all — it makes a
network request to a separate always-on service and streams the audio
<em>back</em> as the model generates it, piece by piece, instead of waiting for
the whole sentence to finish.</li>
  <li>Long text gets split at up to 1024 characters, cut on the last <code class="language-plaintext highlighter-rouge">.</code>/<code class="language-plaintext highlighter-rouge">!</code>/<code class="language-plaintext highlighter-rouge">?</code>
it can find before the limit, so it doesn’t chop a sentence in half —
smarter than our “just cut it off at 300 characters and hope.”</li>
  <li>Cancelling has to happen in <em>two</em> places: locally (stop feeding audio to
the speaker) and remotely (tell the AI service currently mid-sentence
over the network to actually stop generating).</li>
  <li>There’s even a “warmup” — the instant it starts up, it quietly
synthesizes the word “ok” to itself, just so the neural network is
already loaded by the time you need it for real, instead of your first
sentence being the slow one.</li>
</ul>

<p>Kind of validating, honestly. The “cut it into pieces, check a flag between
each one” idea wasn’t a hack we made up — it’s the same shape of solution
the actual Arduino engineers reached for. Theirs just has a neural network
and a network request bolted on the front of it.</p>

<p>The <code class="language-plaintext highlighter-rouge">Speaker</code> class was the real win though. The simple way to use it plays
a whole sound start-to-finish with no way to interrupt it — fine for a short
laser blast, useless for “stop the siren right now.” So instead we feed it
small chunks (a tenth of a second each) in a loop, and check “should I stop?”
between every single chunk:</p>

<div class="language-python highlighter-rouge"><div class="highlight"><pre class="highlight"><code><span class="k">def</span> <span class="nf">_stream_pcm</span><span class="p">(</span><span class="n">speaker</span><span class="p">,</span> <span class="n">sample_rate</span><span class="p">,</span> <span class="n">channels</span><span class="p">,</span> <span class="n">samples</span><span class="p">,</span> <span class="n">stop_event</span><span class="p">):</span>
    <span class="n">chunk_len</span> <span class="o">=</span> <span class="nb">max</span><span class="p">(</span><span class="mi">1</span><span class="p">,</span> <span class="nb">int</span><span class="p">(</span><span class="n">sample_rate</span> <span class="o">*</span> <span class="mf">0.1</span><span class="p">))</span> <span class="o">*</span> <span class="n">channels</span>
    <span class="k">for</span> <span class="n">i</span> <span class="ow">in</span> <span class="nb">range</span><span class="p">(</span><span class="mi">0</span><span class="p">,</span> <span class="nb">len</span><span class="p">(</span><span class="n">samples</span><span class="p">),</span> <span class="n">chunk_len</span><span class="p">):</span>
        <span class="k">if</span> <span class="n">stop_event</span><span class="p">.</span><span class="n">is_set</span><span class="p">():</span>
            <span class="k">break</span>
        <span class="n">speaker</span><span class="p">.</span><span class="n">play</span><span class="p">(</span><span class="n">samples</span><span class="p">[</span><span class="n">i</span><span class="p">:</span><span class="n">i</span> <span class="o">+</span> <span class="n">chunk_len</span><span class="p">])</span>
</code></pre></div></div>

<p>That’s the whole trick behind the SHUT UP button, and behind “press the
siren again while it’s already going” restarting it cleanly instead of two
sirens fighting each other.</p>

<h2 id="making-espeak-ng-actually-stick-around">Making espeak-ng actually stick around</h2>

<p>Remember that <code class="language-plaintext highlighter-rouge">docker exec -u root ... apt-get install espeak-ng</code> fix from
earlier? It worked great — for one restart. Then we rebooted the board again
and it was just gone. Turns out installing something into a running
container by hand doesn’t actually stick — the container gets rebuilt from
scratch every time you redeploy, and “by hand” doesn’t survive being
rebuilt. Cool, so our talking robot’s voice box was actually a ticking time
bomb this whole time.</p>

<p>We did not want to just re-run that command forever every time we updated
the code. So: real fix time.</p>

<p>We remembered seeing a <code class="language-plaintext highlighter-rouge">brick_compose.yaml</code> mentioned in Arduino’s own code
while we were poking around earlier, and it turns out there’s a whole
<a href="https://blog.arduino.cc/2026/04/29/arduino-app-lab-0-7-custom-bricks-are-here/">custom bricks feature</a> for exactly this —
you can package up your own little service, container and all, as part of
your app. Every example of it we could find online only used pre-built
images though, never a Dockerfile you write yourself, so we genuinely didn’t
know if that part actually worked or if we’d be wasting an evening.</p>

<p>Quick test first: a throwaway folder with just a <code class="language-plaintext highlighter-rouge">Dockerfile</code> that installs
espeak-ng and then does nothing (<code class="language-plaintext highlighter-rouge">sleep infinity</code>), wired up as a brick.
Restarted the app to see what would happen.</p>

<p>It built the Dockerfile. For real. Docker log spam and everything, right
there in the deploy output — our own robot, building its own container
image, from a text file we wrote, installing a package with full root
access and zero permission drama, because this time it’s happening at
<em>build</em> time, not sneaking in through <code class="language-plaintext highlighter-rouge">docker exec</code> afterward.</p>

<p>So we built the actual thing: a tiny container that does nothing but run
espeak-ng behind a dead-simple web server —</p>

<div class="language-python highlighter-rouge"><div class="highlight"><pre class="highlight"><code><span class="c1"># POST /synthesize {"text": "...", "voice": "en-us+m3", "speed": 150}
</span><span class="n">result</span> <span class="o">=</span> <span class="n">subprocess</span><span class="p">.</span><span class="n">run</span><span class="p">(</span>
    <span class="p">[</span><span class="s">'espeak-ng'</span><span class="p">,</span> <span class="s">'--stdout'</span><span class="p">,</span> <span class="s">'-v'</span><span class="p">,</span> <span class="n">voice</span><span class="p">,</span> <span class="s">'-s'</span><span class="p">,</span> <span class="n">speed</span><span class="p">,</span> <span class="n">text</span><span class="p">],</span>
    <span class="n">capture_output</span><span class="o">=</span><span class="bp">True</span><span class="p">,</span> <span class="n">timeout</span><span class="o">=</span><span class="mi">10</span><span class="p">,</span>
<span class="p">)</span>
<span class="c1"># ...and send result.stdout back as the response body
</span></code></pre></div></div>

<p>— and now the main robot code just sends it a sentence over the network
and gets a WAV file back, instead of running espeak-ng itself. Since the
whole container gets rebuilt from that same Dockerfile every single time we
deploy, there’s nothing left to mysteriously vanish. Tested it properly
too — full restart, both containers rebuilt from nothing, and the robot
could talk again immediately, no manual fixing required. That’s the actual
fix, not a “seems fine for now.”</p>

<h2 id="cruising-music-without-a-50mb-file">Cruising music (without a 50MB file)</h2>

<p>Last thing: we wanted the robot to play a music track while driving around
— cruising music. Obvious approach: convert the song to the same format as
the sound effects. Except the effects are only a few seconds long, and this
song is almost 5 minutes — converted the “simple” way, it would’ve turned a
7MB mp3 into something like 50MB sitting on the robot for no reason.</p>

<p>So instead of converting the whole song upfront, it gets decoded a tiny
piece at a time, right as it’s needed, and each piece goes straight into the
same chunk-player from before. The song is never sitting fully unpacked in
memory or on disk, and we get to reuse all the cancel/restart logic we’d
already built.</p>

<p><img src="/hall-w-EV/assets/20260813_soundboard_overview.png" alt="" /></p>

<video width="740" controls="">
  <source src="/hall-w-EV/assets/20260813_demo_hall-w-EV_sound_board.mp4" type="video/mp4" />
  Your browser does not support the video tag.
</video>

<h2 id="whats-next">What’s next</h2>

<ul>
  <li><strong>Camera + remote driving</strong> — the “puppy on a leash from your phone” post</li>
</ul>

<h2 id="the-codes">The codes</h2>

<ul>
  <li><a href="https://github.com/tamadillo/hall-w-EV">https://github.com/tamadillo/hall-w-EV</a></li>
</ul>

<p>— <a href="https://github.com/hambreros">Hambreros</a> (and <a href="https://github.com/tamadillo">Tamadillo</a>)</p>]]></content><author><name></name></author><category term="post" /><category term="sound" /><category term="docker" /><category term="tts" /><summary type="html"><![CDATA[Hi again, it’s Hambreros and Tamadillo. Last post the robot learned to roll Post 1 - The wheels are turning (mostly). This post it learned to make noise — sound effects, an air raid siren, an announcement system, and it can even talk now. Getting there was way more of an adventure than the wheels were, mostly because the bug wasn’t actually a bug, it was a whole container we didn’t know existed.]]></summary></entry><entry><title type="html">Post 1 - The wheels are turning (mostly)</title><link href="https://tamadillo.github.io/hall-w-EV/post/servos/web-control/2026/07/26/post-1-basic-motion-primitives.html" rel="alternate" type="text/html" title="Post 1 - The wheels are turning (mostly)" /><published>2026-07-26T22:00:00+10:00</published><updated>2026-07-26T22:00:00+10:00</updated><id>https://tamadillo.github.io/hall-w-EV/post/servos/web-control/2026/07/26/post-1-basic-motion-primitives</id><content type="html" xml:base="https://tamadillo.github.io/hall-w-EV/post/servos/web-control/2026/07/26/post-1-basic-motion-primitives.html"><![CDATA[<p>Hi, I’m <a href="https://github.com/hambreros">Hambreros</a>. I’m 15, and this is my sister,
<a href="https://github.com/tamadillo">Tamadillo</a>’s entry into the <a href="https://community.element14.com/challenges-projects/design-challenges/ez-ev-challenge">Element14 EZ-EV
challenge</a> — my big sister is helping me out as the
official 18 year old entry person for the competition. The plan is to build a
little robot that can drive itself down a hallway, and eventually do useful
stuff on its own. This post is about the first big milestone: <strong>getting the
wheels moving.</strong></p>
<h2 id="what-weve-actually-built">What we’ve actually built</h2>

<p>The brains of the robot are an Arduino UNO Q — it’s got a Linux side and a
real-time STM32 side glued together, which is pretty cool because it means
we get a full web server <em>and</em> precise motor timing on the same board.</p>

<p>For wheels, we’re using two continuous-rotation servos. If you haven’t met
these before: they look exactly like a normal hobby servo (the kind that
turns to a specific angle and holds it), except someone’s popped the case
open and disconnected the little potentiometer that tells the servo where
it’s pointing. Without that feedback, the servo can’t “aim” anymore — so
instead of turning to an angle, it just spins continuously, and the angle
signal becomes a speed-and-direction signal instead. That makes them perfect
cheap wheel motors: no separate motor driver board needed, just a signal
wire straight from the STM32.</p>

<p>Here’s the whole trick, in code. Each servo wants a pulse every 20
milliseconds (50 times a second) — 1.5ms means “stop”, 1ms means “full speed
one way”, 2ms means “full speed the other way”, and everything in between is
a speed in that direction:</p>

<div class="language-cpp highlighter-rouge"><div class="highlight"><pre class="highlight"><code><span class="cp">#define PULSE_STOP 1500
#define PULSE_FWD  1000
#define PULSE_BACK 2000
</span>
<span class="k">static</span> <span class="kt">unsigned</span> <span class="kt">int</span> <span class="nf">speedToPulseUs</span><span class="p">(</span><span class="kt">int</span> <span class="n">speed</span><span class="p">)</span> <span class="p">{</span>
    <span class="n">speed</span> <span class="o">=</span> <span class="n">constrain</span><span class="p">(</span><span class="n">speed</span><span class="p">,</span> <span class="o">-</span><span class="mi">100</span><span class="p">,</span> <span class="mi">100</span><span class="p">);</span>
    <span class="c1">// speed=100 -&gt; 1000us (full forward), speed=-100 -&gt; 2000us (full back)</span>
    <span class="k">return</span> <span class="p">(</span><span class="kt">unsigned</span> <span class="kt">int</span><span class="p">)(</span><span class="n">PULSE_STOP</span> <span class="o">-</span> <span class="n">speed</span> <span class="o">*</span> <span class="p">((</span><span class="n">PULSE_STOP</span> <span class="o">-</span> <span class="n">PULSE_FWD</span><span class="p">)</span> <span class="o">/</span> <span class="mi">100</span><span class="p">));</span>
<span class="p">}</span>
</code></pre></div></div>

<p>One thing that tripped us up: the UNO Q’s normal PWM hardware pins are
locked to 500Hz in the board’s config, which is way too fast for servos —
they expect a pulse every 20ms, not every 2ms. So instead we’re “bit
banging” it — just toggling the pin HIGH and LOW ourselves with precise
microsecond delays, in a loop, which turns out to work great and means we
can use basically any digital pin, not just the “official” PWM ones.</p>

<h2 id="the-web-page">The web page</h2>

<p>We didn’t want to have to plug a laptop into the robot every time we wanted
it to move, so the STM32 side exposes two functions — <code class="language-plaintext highlighter-rouge">set_wheel1(speed)</code>
and <code class="language-plaintext highlighter-rouge">set_wheel2(speed)</code> — over the UNO Q’s built-in bridge, and the Linux
side runs a little Flask web page with a slider for each wheel. Drag a
slider up, that wheel spins forward; drag it down, it goes backward; let go,
and it springs back to the middle and stops — like a throttle stick, not a
light switch. There’s also one big STOP ALL button because, well, it’s a
robot with wheels and you should always have a big red button.</p>

<p>We also added a small safety net that I’m pretty proud of: if the web page
loses its connection (phone goes to sleep, wifi drops, whatever) and no
command has arrived for a full second, the STM32 stops both wheels on its
own. So the worst case if my browser tab crashes isn’t “robot drives itself
off the desk,” it’s just “robot stops.”</p>

<video width="740" controls="">
  <source src="/hall-w-EV/assets/20260726_basic_wheel_motion_via_web.mp4" type="video/mp4" />
  Your browser does not support the video tag.
</video>

<h2 id="the-mystery-clicking-noise">The mystery clicking noise</h2>

<p>Here’s the annoying bit. With both sliders sitting dead center at “stop,”
the wheels are supposed to just… sit there. Instead we’re getting a faint
little clicking sound, like the servo is “self-correcting” even though
nothing is telling it to move. Turns out this is a pretty well-known thing
with continuous-rotation servos: because they’re built from a normal
position-holding servo, there’s still a tiny bit of the original control
circuit inside trying to hold a “center” position. If our 1500us stop signal
doesn’t land <em>exactly</em> on the point the servo was trimmed to when its
feedback pot got disconnected, it thinks it’s very slightly off target and
keeps nudging the motor to correct — click, click, click.</p>

<p>The fix isn’t code so much as calibration — most of these servos have a
tiny trim potentiometer on the back for exactly this. But since we’d rather
tune it in software than hunt for a jeweler’s screwdriver every time, next
step is adding a per-servo trim offset so we can dial each one in separately
without touching the hardware:</p>

<div class="language-cpp highlighter-rouge"><div class="highlight"><pre class="highlight"><code><span class="cp">#define SERVO1_TRIM_US  0    // tweak until wheel 1 is silent at speed=0
#define SERVO2_TRIM_US  0    // tweak until wheel 2 is silent at speed=0
</span>
<span class="k">static</span> <span class="kt">unsigned</span> <span class="kt">int</span> <span class="nf">speedToPulseUs</span><span class="p">(</span><span class="kt">int</span> <span class="n">speed</span><span class="p">,</span> <span class="kt">int</span> <span class="n">trimUs</span><span class="p">)</span> <span class="p">{</span>
    <span class="n">speed</span> <span class="o">=</span> <span class="n">constrain</span><span class="p">(</span><span class="n">speed</span><span class="p">,</span> <span class="o">-</span><span class="mi">100</span><span class="p">,</span> <span class="mi">100</span><span class="p">);</span>
    <span class="k">return</span> <span class="p">(</span><span class="kt">unsigned</span> <span class="kt">int</span><span class="p">)(</span><span class="n">PULSE_STOP</span> <span class="o">+</span> <span class="n">trimUs</span>
                           <span class="o">-</span> <span class="n">speed</span> <span class="o">*</span> <span class="p">((</span><span class="n">PULSE_STOP</span> <span class="o">-</span> <span class="n">PULSE_FWD</span><span class="p">)</span> <span class="o">/</span> <span class="mi">100</span><span class="p">));</span>
<span class="p">}</span>
</code></pre></div></div>

<p>A few microseconds either way should be enough to quiet it down completely.</p>

<h2 id="whats-next">What’s next</h2>

<p>Right now the robot can be driven around from a phone or laptop on the same
network, which already feels like magic. Next up, roughly in order:</p>

<ul>
  <li><strong>Camera + remote driving</strong> — stick a camera on it and add WASD/on-screen
controls to the web page, so it’s basically a little puppy on a leash you
can drive from anywhere.</li>
  <li><strong>Simple autonomy</strong> — a strip of tape down the hallway and some basic
light-sensor logic so it can follow the line by itself.</li>
  <li><strong>Manual override</strong> — a mode switch so it can drive itself but I can grab
the wheel (well, the sliders) whenever I want.</li>
  <li><strong>Telemetry / a face</strong> — battery level, current mode, maybe even a little
animated face on an OLED screen so it has some personality.</li>
</ul>

<p>Long term, the goal is a robot that can scoot around the house on its own
and do small useful things — not just drive in a straight line, but actually
be handed simple tasks. One step at a time though. Wheels first!</p>

<h2 id="the-codes">The codes</h2>

<ul>
  <li><a href="https://github.com/tamadillo/hall-w-EV">https://github.com/tamadillo/hall-w-EV</a></li>
</ul>

<p>— <a href="github-hamberors">Hambreros</a> (and <a href="https://github.com/tamadillo">Tamadillo</a>)</p>]]></content><author><name></name></author><category term="post" /><category term="servos" /><category term="web-control" /><summary type="html"><![CDATA[Hi, I’m Hambreros. I’m 15, and this is my sister, Tamadillo’s entry into the Element14 EZ-EV challenge — my big sister is helping me out as the official 18 year old entry person for the competition. The plan is to build a little robot that can drive itself down a hallway, and eventually do useful stuff on its own. This post is about the first big milestone: getting the wheels moving. What we’ve actually built]]></summary></entry></feed>